


Touch Screen
Calibrating the Touch Screen
Although the touch screen is installed and calibrated at the factory, users may make adjustments to the calibration. To
calibrate the touch screen, select Start > Programs > UPDD > Calibrate.
The calibration utility displays a cross on the screen. Touch the center of the cross with the stylus and hold for a few seconds.
Release and repeat with the next cross. After all locations have been touched, the calibration utility automatically closes.
If no input is received, the calibration utility times out. Press ESC to exit the calibration utility without saving any changes.
Disabling the Touch Screen
If desired, the touch screen can be disabled in the Windows control panel. Once disabled, the touch screen remains disabled
until it is enabled again.
To disable the touch screen, select:
Start > Control Panel > System > Device Manager > Mice and other pointing devices
Start > Control Panel > System > Hardware > Device Manager > Mice and other pointing devices
Click on the list. In the list is a listing for Universal Pointer Device Driver. Right-click on this listing and select Disable from the
menu.
To enable the touch screen, follow the same process, selecting Enable from the right-click menu.
Network Configuration
There are several networking options available for the Thor VX9.
802.11 Wireless Radios
Please refer to the instructions for configuring the 802.11 a/b/g/n, 802.11 b/g or 802.11 a/b/g radio in Wireless Network
Configuration.
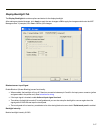
Ethernet Connector
When the Thor VX9 is networked using the Ethernet connector, the Thor VX9’s networking options are set via the Microsoft
Windows Control Panel. The same networking configuration options are available as in a standard PC.
For more information on configuring the Microsoft Windows network settings, please refer to Help and Support on the Windows
Start menu or commercially available Windows networking literature.
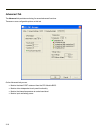
WWAN
Please refer to the instructions for configuring theWWAN radio in Wireless Network Configuration.
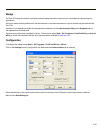
Bluetooth
Please refer to the information on configuring the Bluetooth radio.
3-12