


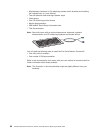

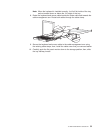
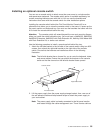


11. Loosen the four rail-adjustment screws on both rear slide-rail brackets; then,
extend the brackets to their maximum outward adjustment.
Note: You must remove the screw that attaches the cable-management arm to
the left-rear bracket in order to adjust the left slide rail.
Left-rear
adjustment
screws
Right-rear
adjustment
screws
Cable-management arm
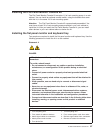
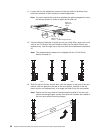
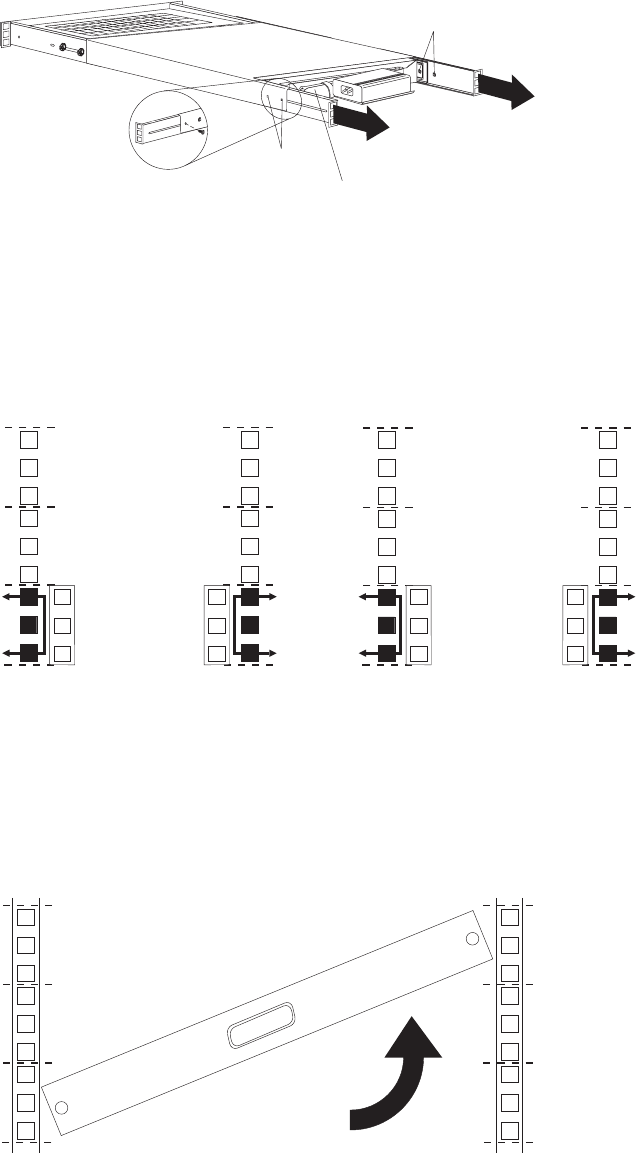
12. Use the following illustration to guide you as you install either cage nuts or clip
nuts for the 1U location that you chose to install your flat panel monitor and
keyboard tray. Use the cage nuts or clip nuts from the miscellaneous hardware
kit.
Note: The miscellaneous hardware kit is shipped with the 1U Flat Panel
Monitor Console kit.
UUUU
UUU
U
U
U
U
U
Front Rear
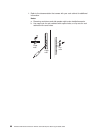
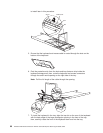
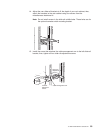
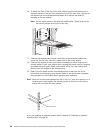
13. Slide the tray all the way inward; then, with one person at the front of the rack
cabinet, and one person at the rear of the rack cabinet, carefully tilt the flat
panel monitor and keyboard tray at an angle and slide it into the rack cabinet.
Note: Ensure that the rear slide-rail brackets extend outside of the rear rack
cabinet mounting flanges, and the front slide-rail brackets are outside of
the front rack cabinet mounting flanges.
92 Hardware Maintenance Manual: IBM PC Server/Enterprise Racks Types 9306, 9308