


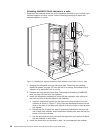

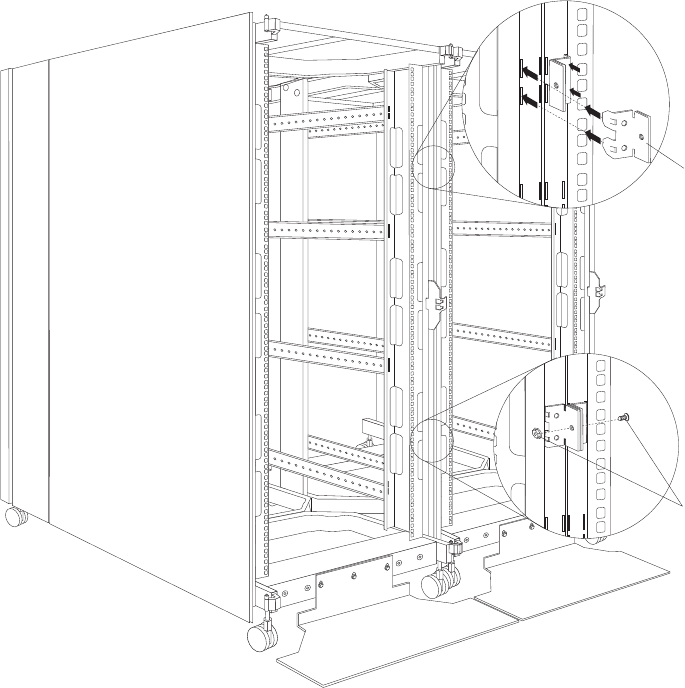
Attaching NetBAY42 Rack cabinets in a suite
Expansion rack cabinets come with all the hardware required for you to attach rack
cabinets together and form a suite. Use the following procedure to attach rack
cabinets together in a suite:
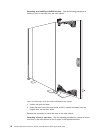
1. Remove the side panel and rear filler panel (see “Removing and installing
NetBAY42 panels” on page 13) from the side of a primary rack cabinet that is
adjacent to an expansion rack in a suite.
2. Remove the front and rear doors (see “Removing and installing a NetBAY42
door” on page 18) from both rack cabinets.
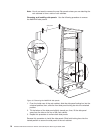
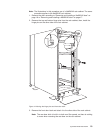
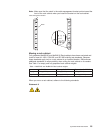
3. Install the attachment brackets that come with the expansion rack cabinet on
the front and rear of the two adjacent rack cabinets:
a. Insert an attachment bracket into the slots on the front of one of the rack
cabinets as shown in Figure 17; then, insert an attachment bracket into the
slots on the front of the other rack cabinet so that the holes in each bracket
are aligned.
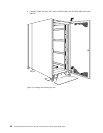
b. Repeat step 3a to install four sets of attachment brackets on the front and
rear of both rack cabinets. Install attachment bracket pairs near the top and
bottom of the rack cabinets.
c. Use the bolts and nuts that come with the expansion rack cabinet to attach
the rack cabinets to each other.
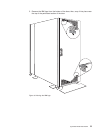
4. Install the panels that you removed in step 1 on the expansion rack cabinet.
Attachment
bracket
Bolt and nut
Figure 17. Attaching two adjacent NetBAY42 Rack cabinets to each other to form a suite
22 Hardware Maintenance Manual: IBM PC Server/Enterprise Racks Types 9306, 9308