Appendix C. Service Processor Setup and Test
For your convenience, here is an example Service Processor setup checklist. It is
basic. Your setup may include more or less of the available features, so you may
wish to adjust this checklist for your own application. This checklist will at least
provide you with a starting place.
Service Processor Setup Checklist
1. Unplug the power cord from the server.
2. Attach a local terminal for this setup procedure.
3. Plug in the server and power on the local terminal.
Attention:Server power should remain off.
4. Bring up the Service Processor Menus, see Chapter 4, “Service Processor
Menus” on page 4-1.
5. Set the System Name, “Privileged User Menus” on page 4-6.
6. Enable Surveillance, see 4-8, and “Service Processor Functions and Features”
on page 4-24
7. Configure Call-In/Call-Out, see “CALL-IN/CALL-OUT SETUP MENU” on
page 4-16 and “Modem Configuration Menu” on page 4-16.
8. Exit the Service Processor menus
9. Unplug the power cord from the server.
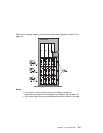
10. Attach modem(s) (if needed), page 4-3
11. Plug in the server
Attention: Server power should remain off.
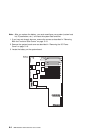
12. Test
Call-In, page C-2
Call-Out, page C-2
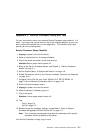
13. Backup the service processor settings, as described in “Save or Restore
Hardware Management Policies Service Aid” on page 7-9.
Note: This is strongly recommended to protect the usefulness of the service
processor and the availability of the server.
Your Service Processor is ready to go to work.
Appendix C. Service Processor Setup and Test C-1


