Removing/Installing Server Components 33
Installing the DIMM Boards
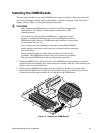
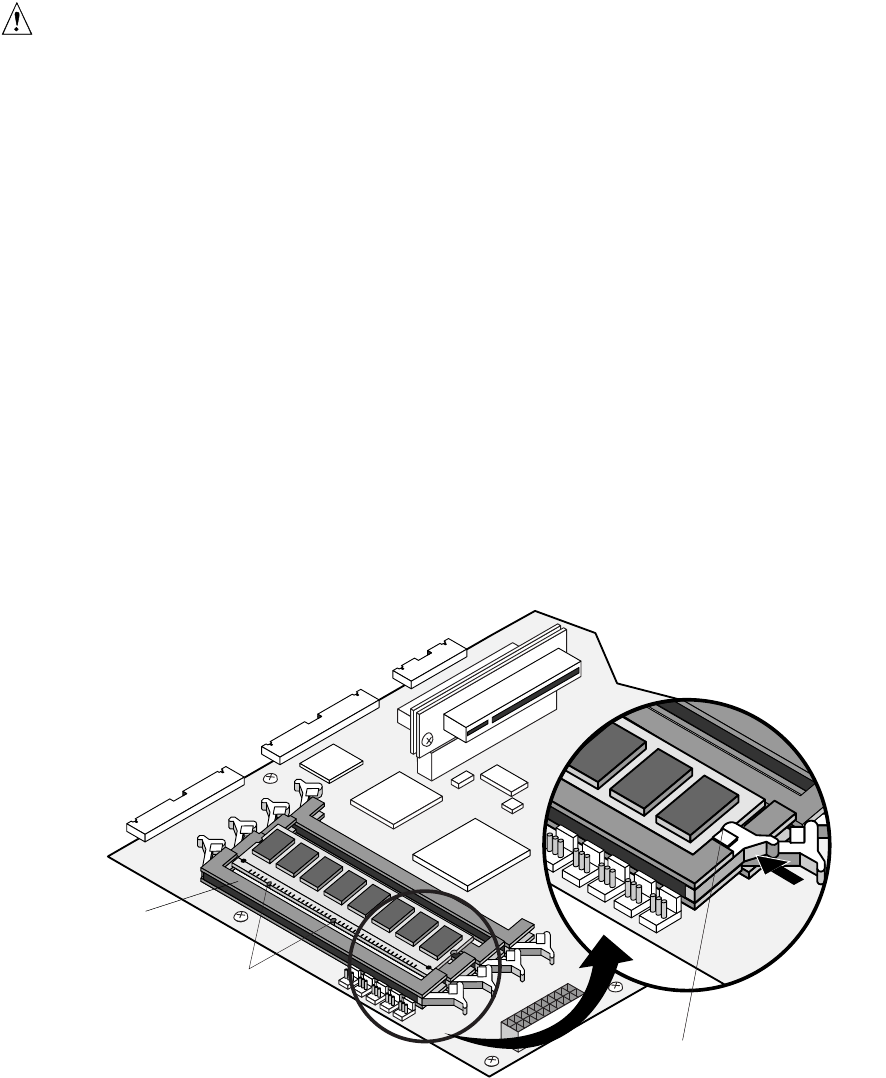
This procedure describes how to install DIMM boards on the server board. Before proceeding, be
sure you are thoroughly familiar with the information in “Before You Begin” at the front of this
chapter. Refer to Figure 13 while performing this procedure.
CAUTIONS
Make sure that the DIMM board(s) you wish to install has the appropriate
characteristics. See Chapter 1 for the required characteristics of the
supported memory.
Use extreme care when installing a DIMM board. Applying too much
pressure or misaligning the board in the socket can damage the sockets or
DIMM board edge connectors. DIMM board edge connectors are keyed and
can be inserted only one way.
You can reduce the risk of damaging a connector by installing the DIMM
boards starting with the back socket on the server board and move toward the
front of the server.
Mixing dissimilar metals can cause memory failures that result in data
corruption. The DIMM board sockets on the server board are gold plated.
Thus, only install DIMM boards with gold-plated edge connectors.
1. Orient the DIMM board so the key slots (A) in the DIMM board edge connector are properly
aligned with the corresponding slots in the mating server board socket (B). (The connectors are
keyed to mate in only one direction.)
2. Firmly press the DIMM board straight down and all the way into the server board socket.
3. Make sure the DIMM board is locked in by pressing the levers (C) on each end of the server
board socket into the mating notches (D) on each edge of the DIMM board.
B
D
C
A
OMO9433
Figure 13. Installing the DIMM Boards


