


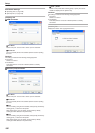

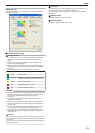
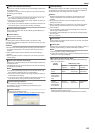

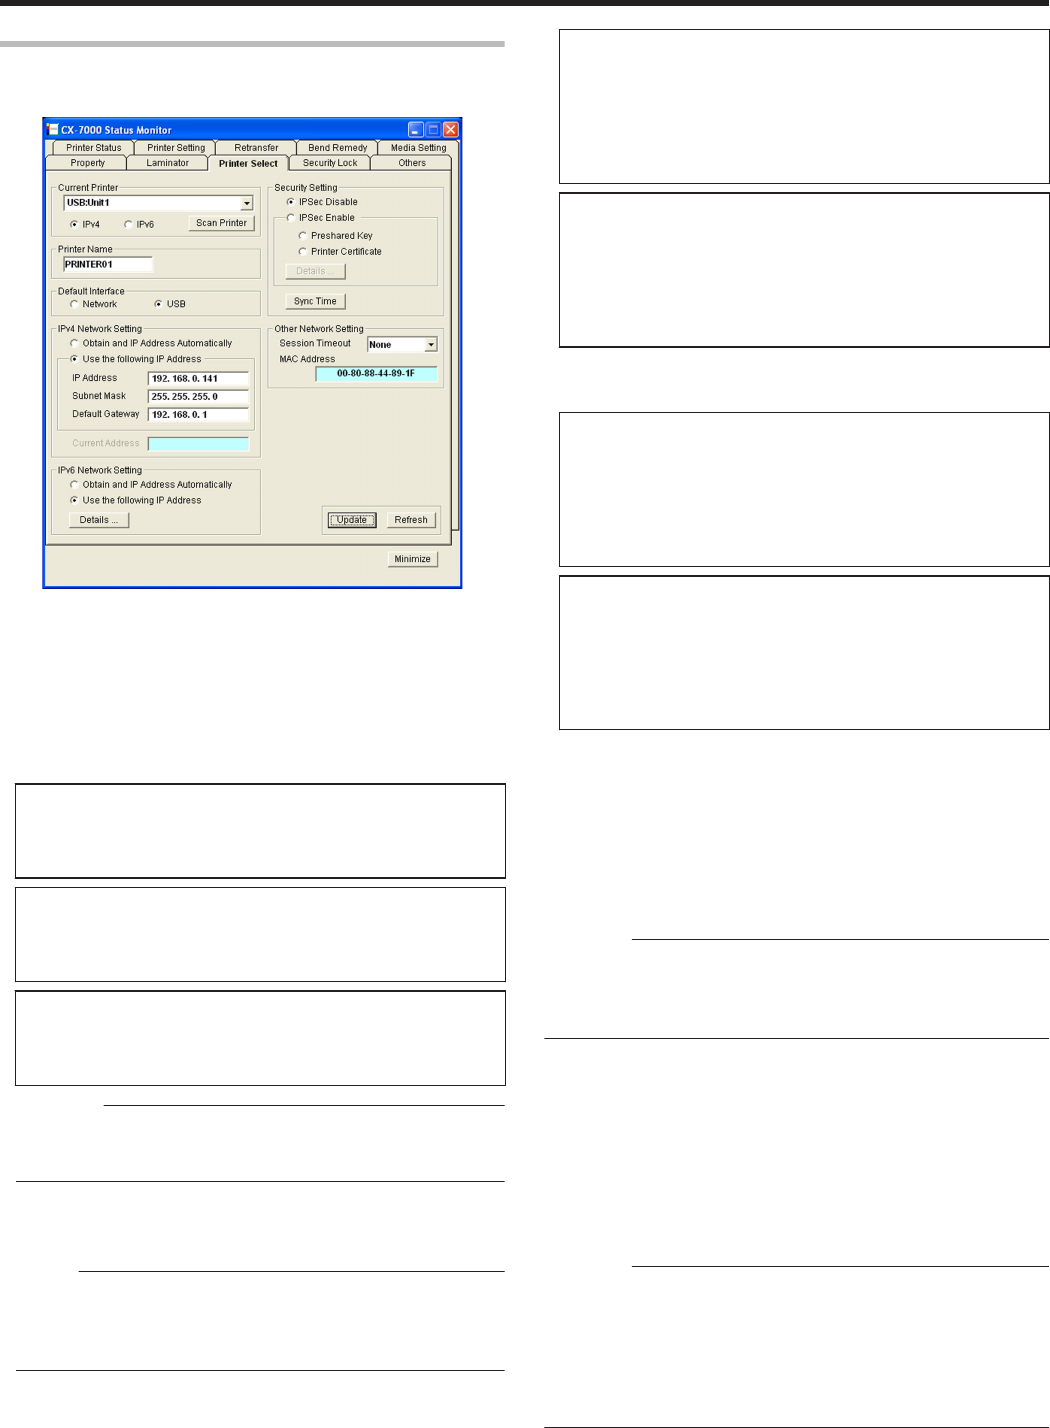
[Printer Select] Tab
This tab is used for selecting a printer and specifying the network
settings.
.
m
Current Printer
m
Selecting a printer
Selecting a printer from the pull-down menu switches the display to
the current status of the selected printer.
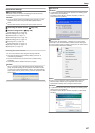
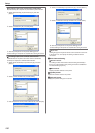
m
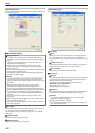
Searching a printer
Clicking the [Scan Printer] button displays the search results in the
pull-down menu.
m
Searching USB connection printers
A Click [Scan Printer].
B Printer search is performed, and the result is displayed in the
pull-down menu.
m
Searching printers for the IPv4 address
A Select [IPv4], and click [Scan Printer].
B Printer search is performed, and the result is displayed in the
pull-down menu.
m
Searching printers for the IPv6 address
A Select [IPv6], and click [Scan Printer].
B Printer search is performed, and the result is displayed in the
pull-down menu.
Cautions:
v
The printer connected via Ethernet (LAN) may not be searchable if
IPSec is enabled. In this case, search the printer again after
registering the printer.
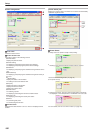
m
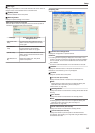
Registering a printer
You can enter the IP address in the pull-down menu to register the
printer for the IP address in the menu.
Memo:
v
Registered IP addresses will be stored in the memory even after
exiting the status monitor.
v
The printer cannot be registered if the IP address format is
incorrect.
m
Registering printers for the IPv4 address
A Select [IPv4], and enter the IPv4 address in the pull-down
menu.
B Click [Scan Printer] to display the registration confirmation
dialog box.
C Click [OK] to register the printer for the entered IP address to
the pull-down menu.
m
Registering printers for the IPv6 address
A Select [IPv6], and enter the IPv6 address in the pull-down
menu.
B Click [Scan Printer] to display the registration confirmation
dialog box.
C Click [OK] to register the printer for the entered IP address to
the pull-down menu.
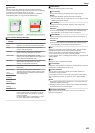
m
Deleting a printer
You can select a printer and delete it from the pull-down menu.
m
Deleting printers for the IPv4 address
A Select [IPv4], followed by selecting the printer to delete from
the pull-down menu.
B Select [Delete Printer] from the pull-down menu. A deletion
confirmation dialog box appears.
C Click [OK] to delete the selected printer from the pull-down
menu.
m
Deleting printers for the IPv6 address
A Select [IPv6], followed by selecting the printer to delete from
the pull-down menu.
B Select [Delete Printer] from the pull-down menu. A deletion
confirmation dialog box appears.
C Click [OK] to delete the selected printer from the pull-down
menu.
m
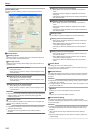
Printer Name
For setting the name of the selected printer.
You can input up to 10 ASCII characters. Symbol characters may not
be displayed on the operation panel.
m
Default Interface
For setting the interface during startup. For Ethernet (LAN) connection,
the settings are displayed in the read-only mode, and they cannot be
changed.
Cautions:
v
Regardless of the default interface setting, priority is given to USB if
a USB cable is connected.
v
To assign priority to the USB connection, enable the operation of the
computer and USB hub.
m
Network
Enables you to print via the Ethernet (LAN) connection.
m
USB
Enables you to print via the USB connection.
m
IPv4 Network Setting
For setting items related to Ethernet (LAN). For Ethernet (LAN)
connection, the settings are displayed in the read-only mode, and they
cannot be changed.
Cautions:
v
Determine the network setting items according to the instructions of
the network administrator for the location where the printer unit is
installed.
v
Other network devices may be affected if the network setting is
incorrect.
v
When only USB connection is used, there is no need to specify the
network setting.
Setup
114