


Ink Ribbon
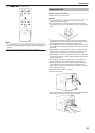
Ink Ribbon has Run Out
v
Replace with a new ink ribbon.
Cautions:
v
If the security lock is on, deactivate it. After work is complete,
activate the security lock again.
v
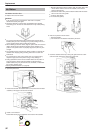
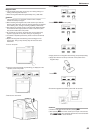
Stand the cassette on a flat surface as illustrated in the diagram.
Avoid doing so on the floor as dust attached to it may cause printing
errors.
.
v
Do not touch the inked surface (the side that faces outward when
installed) with your hand. Touching it may cause printing errors. Put
on the supplied gloves when handling the ink ribbon.
v
When installing a used ink ribbon, align the yellow side of the unused
ribbon with the arrow indicated on the label of the cassette. If the
position of the yellow side is not properly aligned, the print may turn
out light.
v
The cassette is heavy when the ink ribbon is loaded. To prevent the
cassette from dropping during handling, make sure to hold it with
both hands.
v
Do not perform any work on the printer door. Do not place heavy
objects or apply load on the printer. Doing so may damage it.
v
During replacement, clean the four bobbin holders on the printer. If
burrs produced by friction with the bobbins are attached to the
bobbin holders, they may fall onto the card, ink ribbon, or retransfer
film, causing printing errors.
"Cleaning the bobbin holders" (A page 40)
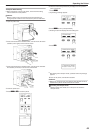
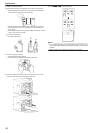
1
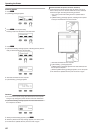
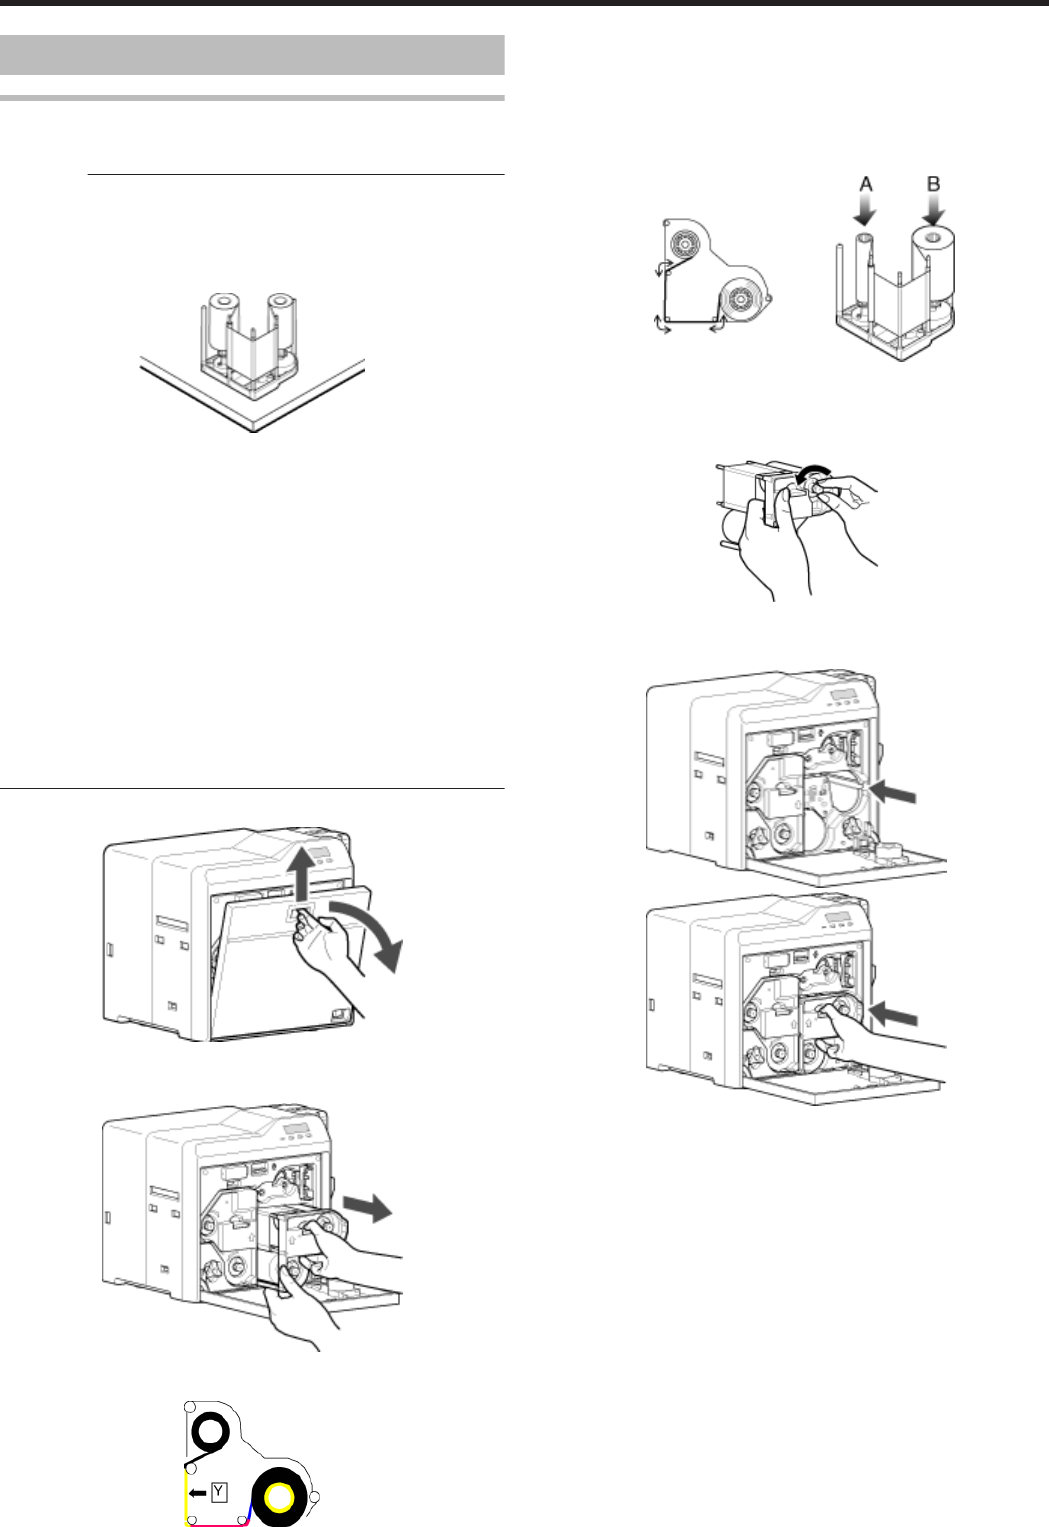
Open the printer door
.
2
Press and hold down the cassette button, and pull out the ink ribbon
cassette (on the right) to remove the ink ribbon
.
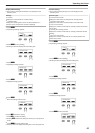
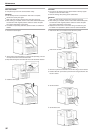
3
Install a new ink ribbon
v
Install while referring to the indication on the label of the cassette.
.
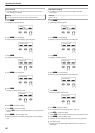
A
With the inked surface facing outward, align the yellow side of the
unused ribbon with the arrow on the cassette, and unwind it
along the three shafts.
B Insert the ink ribbon firmly into the bobbin holders with the ribbon
set to the far end of the guides.
v
A: take-up side (black)
v
B: unused side (yellow)
.
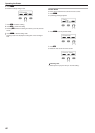
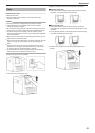
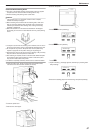
4
Remove any slack in the ink ribbon
A Hold the cassette.
B Turn the knob in the direction indicated by the arrow.
.
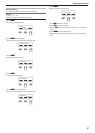
5
Insert the cassette all the way in along the guide rail until a “click”
sound is heard, followed by closing the printer door
.
.
Replacement
32