7
Click [OK]
v
Exits the installation program.
v
You can now start the status monitor from [Start menu].
Cautions:
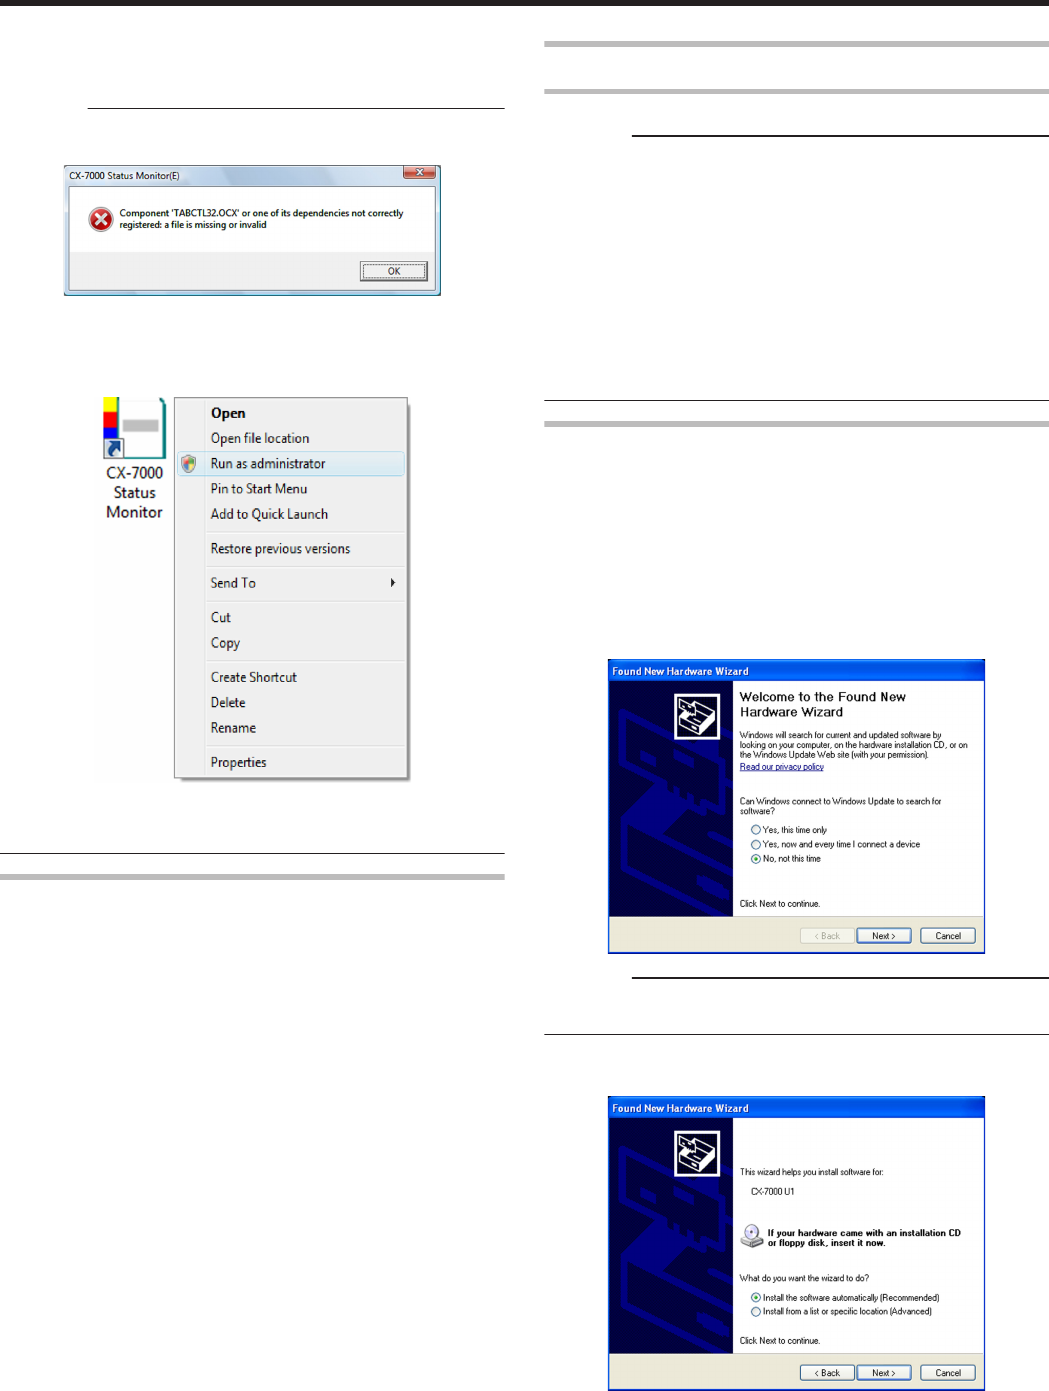
v
The following error may occur when you start executing the status
monitor on Windows Vista.
.
Cause: The status monitor cannot run because the program cannot be
identified by Windows Vista.
Action: Select “Run as administrator” to start the status monitor as a
user with administrator authority. Doing so enables the program to be
identified by Windows Vista, and the same error will not recur.
.
v
Even if a user is logged on with the administrator account on
Windows Vista, the user may be regarded as one without
administrator authority when running the status monitor.
Update of Status Monitor
1
Delete the status monitor
"Uninstalling the Status Monitor" (A page 83)
2
Re-install the status monitor
"Installing the Status Monitor" (A page 75)
USB Driver
Installing the USB Driver
Cautions:
v
The USB driver is also installed while you are installing the printer
driver via USB connection.
v
Install the USB driver additionally only when you want to set items
other than the [Printer Name] on the [Printer Selection] screen of the
status monitor.
v
Do not turn on the power of the printer until instruction asking you to
do so appears on the installer.
v
Do not connect the printer to the USB until instruction asking you to
do so appears on the installer.
v
You need to enable the USB hub before connecting the printer via
this hub. Do not connect the printer to the USB hub until instruction
asking you to do so appears.
Windows XP
1
Start up Windows
2
Set the supplied CD-ROM into the computer
v
The “SETUP.exe” automatic execution program in the CD-ROM is
not used. Exit this program.
3
Connect the computer and printer using the USB cable, and turn on
the power of the printer
v
The printer is automatically detected by the computer.
v
A [Found New Hardware Wizard] screen appears.
.
Cautions:
v
Connection is improper if this screen does not appear. Make sure
that the connection is properly established.
4
Select [No, not this time], and click [Next]
v
An installation method selection screen appears.
.
Setup
76


