Printing without a computer
16 www.kodak.com/go/support
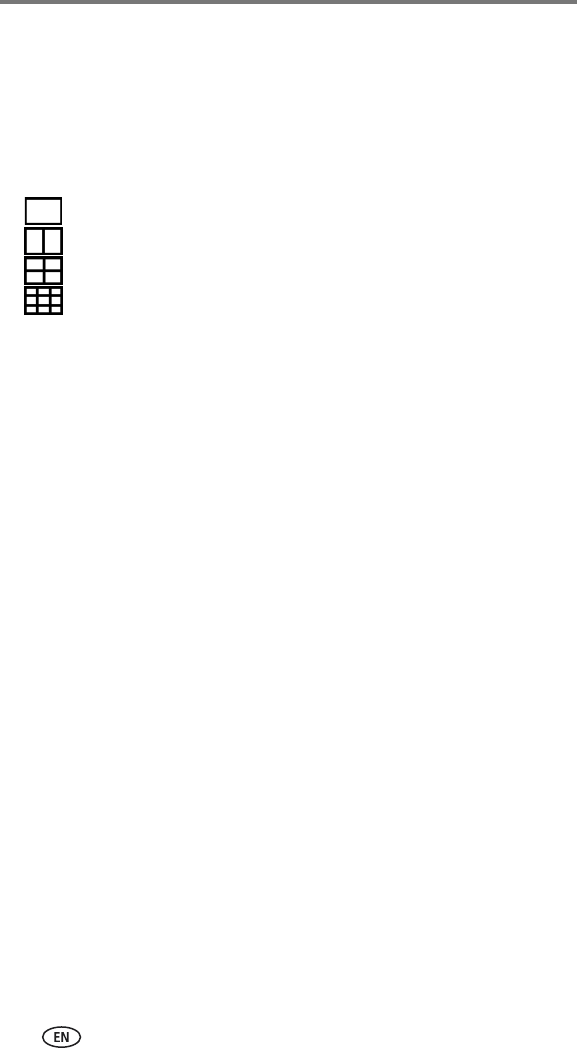
Changing the printed picture size
1 Follow the procedure for printing from your EasyShare camera (see
page 13), Kodak 8-in-1 card reader (see page 15), or PictBridge device
(see page 15).
2 Before printing, while making selections or changing settings, press the
Picture size button repeatedly to scroll through the available options:
1 up—one 4 x 6 in. (102 x 152 mm) picture per print (default)
2 up—two 2.1 x 3.3 in. (54 x 85 mm) pictures per print
4 up—four 2 x 3 in. (51 x 76 mm) pictures per print
9 up—nine 1.3 x 2 in. (34 x 51 mm) pictures per print
In most cases, the Picture size setting also determines the number of
copies that are printed. For example, if you choose to print a picture with
2 up selected, 2 copies of that picture will be printed on one sheet of
paper.
When printing tagged pictures (see page 14), the number of copies that
are printed is determined by the setting on your camera or device. For
example, if three pictures on your camera are each tagged for printing one
copy, and the 4 up option on the printer dock is selected, three 2 x 3 in.
(51 x 76 mm) pictures are printed on one sheet of paper.
For best results, choose a picture size or number of copies (on your camera
or device) that maximizes the use of white space on the paper.
3 Continue changing other settings or begin printing.
NOTE: When printing from a PictBridge device (see page 15), picture size is controlled by the
multi-up setting on the device itself, if available. The Picture size lights indicate the device’s
selected multi-up option, based on the closest available format on the printer dock.
To change the default picture size:
■ Select a picture size (see above), then press and hold the Picture size
button for 4 seconds.
The selected Picture size light flashes, then turns solid.


