


4-21 4059 Service Manual
4059-XXX
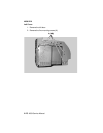
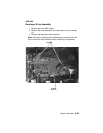
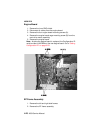
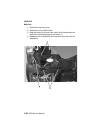
Duplex Board
1. Lift the base printer from the duplex assembly.
2. Remove the four duplex board cover mounting screws.
3. Gently disconnect the cables from the duplex board. Use
caution to avoid damage to the cables and connectors.
4. Remove the two duplex board mounting screws and remove the
duplex board.
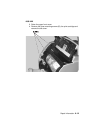
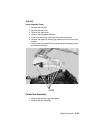
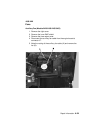
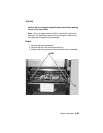
Duplex Front Cover Assembly
1. Lift the base printer from the duplex assembly.
2. Remove the four duplex board cover mounting screws and
disconnect the duplex cover door switch cable at connector J6.
3. Position the duplex assembly on its side.
4. Gently release the three front cover assembly latches from the
bottom of the duplex assembly.
5. Remove the duplex front cover assembly.
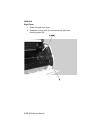
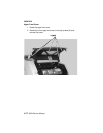
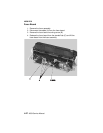
Duplex Front Cover Door
1. Remove the duplex front cover assembly.
2. Holding the front of the assembly away from you, open the
cover door and gently pry the left side door pivot from the
mounting.
3. Move the cover door to the left to clear the right door pivot from
the mounting and remove the duplex front cover door.
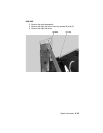
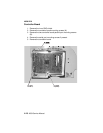
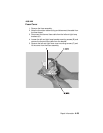
Duplex Front Cover Door Switch
1. Remove the duplex front cover assembly.
2. Remove the four duplex board cover screws and disconnect the
cover door switch cable at connector J6.
3. Loosen the cover door switch mounting screw and remove the
switch.
Note: Be sure the cover door switch is properly positioned in the
mounting slots when reinstalling to allow the duplex cover door
actuator arm to operate the switch.