


Diagnostic Information 2-32
4059-XXX
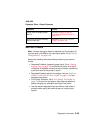
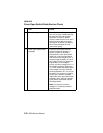
Dead Machine Service Check
Note: Remove any paper handling options before servicing the
printer for a dead machine condition. Observe all necessary ESD
precautions when removing and handling the controller board,
engine board or any of the installed option cards or assemblies.
Service Tip: When removing the LVPS from the printer observe the
following:
1. The LVPS uses a self docking connector that mates with
another connector mounted on the left side frame assembly.
Some force may be required to pull the LVPS loose from the
connector.
2. Gently remove the LVPS supply using caution not to damage
the printed circuit board. Pull the LVPS out far enough to reach
the fuser lamp cable.
3. The fuser lamp cable uses a locking type of connector system.
Unlock the fuser lamp cable connector, disconnect the cable
and remove the LVPS from the printer.
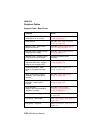
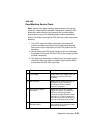
FRU Action
1 Line Voltage Check the AC line voltage. If the line
voltage is incorrect, inform the
customer.
2 AC Line Cord Check the line cord for any signs of
damage. If correct, check the
continuity of the line cord and
replace if necessary.
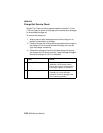
3 +5 V dc at any Option
Connector
Check for +5 V dc on any of the
option connectors. The easiest to
access is the envelope feeder
connector located behind the lower
front door. If +5 V dc is present at
any of the connectors, go to step 9. If
+5 V dc is not present, go to step 4.
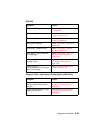
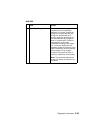
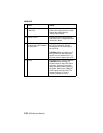
4 +5 V dc at the controller
board test point
Check for +5 V dc at the +5 V dc test
pad located on the controller board.
If correct, go to step 9.