


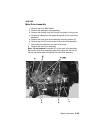


Repair Information 4-44
4059-XXX
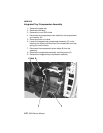
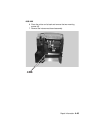
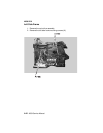
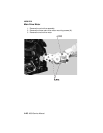
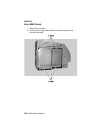
Main Drive Assembly
1. Remove the inner EMC shield.
2. Remove the developer drive assembly.
3. Remove the transfer shaft (A) through the bottom of the printer.
4. Remove all cables from the cable clamps (B) on the main drive
assembly.
5. Remove the three main drive assembly mounting screws (C).
6. Remove the link (D) from the rear of the main drive assembly.
7. Disconnect the cable from the main drive motor.
8. Remove the main drive assembly.
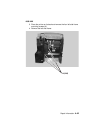
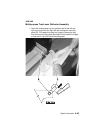
Note:
Do not remove
the screws (E) on the main drive assembly.
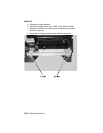
Be sure the main drive assembly gear shaft aligns with the hub on
the left side frame when reinstalling the main drive assembly.