


2-29 4059 Service Manual
4059-XXX
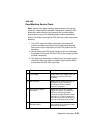
Charge Roll Service Check
Service Tip: Close and evenly spaced repetitive marks 47.19 mm
(1.86 inch) apart or spots on the page can be caused by a damaged
or contaminated charge roll.
To remove the charge roll:
1. Wrap a piece of plain white paper around the charge roll to
prevent contamination or damage.
2. Carefully remove the roll by pressing outward and to the right on
the charge roll link arm and remove the charge roll from the
right side charge roll bearing.
3. Remove the charge roll from the left side charge roll bearing
and remove the roll from the printer. Leave the paper wrapped
around the charge roll until it is reinstalled.
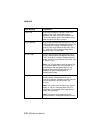
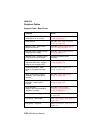
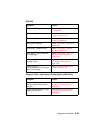
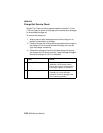
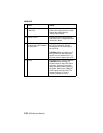
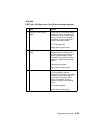
FRU Action
1 Charge Roll Assembly Check the charge roll for correct
installation, toner buildup, marks,
cuts or other signs of contamination
or damage. Replace as necessary.
2 Left Side Charge Roll Link Check the left side charge roll link
assembly for correct assembly
operation. Check for damage to the
arm or bearing assembly.