88
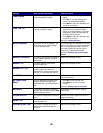
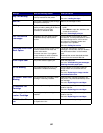
56 Serial Port <x>
Disabled
Data has been sent to the printer
through a serial port, but the serial port
is disabled.
•Press Go to clear the message. The
printer discards any data received
through the serial port.
• Make sure the Serial Buffer menu item in
the Serial Menu is not set to Disabled.
See also: Serial Buffer
56 Standard Serial
Disabled
56 Parallel Port <x>
Disabled
Data has been sent to the printer
through a parallel port, but the parallel
port is disabled.
•Press Go to clear the message. The
printer discards any data received
through the parallel port.
• Make sure the Parallel Buffer menu item
in the Parallel Menu is not set to
Disabled.
See also: Parallel Buffer
56 Std Parallel Port
Disabled
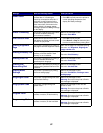
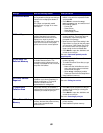
56 USB Port <x>
Disabled
Data has been sent to the printer
through a USB port, but the USB port
is disabled.
•Press Go to clear the message. The
printer discards any data received
through the USB port.
• Make sure the USB Buffer menu item in
the USB Menu is not set to Disabled.
See also: USB Buffer
56 Standard USB Port
Disabled
58 Input Config Error
Either too many drawers with matching
trays are attached to the printer or the
input configuration is invalid. (For
example, a duplex unit is installed
between Tray 3 and Tray 4.)
Turn off and unplug the printer. Remove the
additional drawers or reconfigure the
offending option. Plug in the printer and
turn it on.
See also: Setup Guide
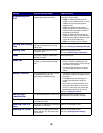
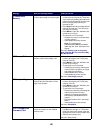
58 Output Config
Error
Too many output options have been
attached to the printer.
Turn off and unplug the printer. Remove the
additional output option(s). Plug in the
printer and turn it on.
See also: Setup Guide
58 Too Many Disks
Installed
Too many hard disks are installed on
the printer. The printer only supports
one hard disk at a time.
Turn off and unplug the printer. Remove the
excess hard disks from the printer. Plug in
the printer and turn it on.
See also: Removing memory and option
cards
58 Too Many Flash
Options
Too many flash memory options are
installed on the printer.
Turn off and unplug the printer. Remove the
excess flash memory. Plug in the printer
and turn it on.
See also: Removing memory and option
cards
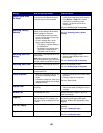
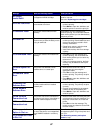
59 Incompatible
<device>
You have installed an incompatible
device.
Remove the device and press Go to clear
the message.
61 Defective Disk
The printer detects a defective hard
disk.
•Press Go to clear the message and
continue printing.
• Install a different hard disk before you
perform any operations that require one.
See also: Setup Guide
62 Disk Full
There is not enough memory on the
hard disk to store the data sent to the
printer.
•Press Go to clear the message and
continue processing. Any information not
previously stored on the hard disk is
deleted.
• Delete fonts, macros, and other data
stored on the hard disk.
Message What this message means What you can do


