


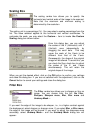

size of the scanned image file, it is better to select and scan only the
necessary part of the image with selection area.
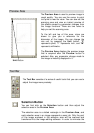
To adjust the selection area:
1.
Move the selection area by pointing the mouse cursor to the
selection area. When the cursor turns into a crossed arrow, click
and drag your mouse to move the selection area in the Preview
Area.
2.
Adjust the size of selection area by moving the cursor over the
edge of selection area. When the cursor turns into a double-sided
arrow, click and drag your mouse to expand or shrink the
selection area.
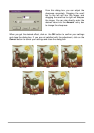
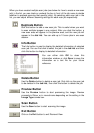
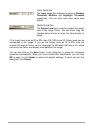
New Frame Button
Use the New Frame button to add a new selection area to the
Preview Area. (To do so, you can also use the Duplicate button in
Job List). First click this button, then move the mouse cursor into the
Preview Area. When the cursor becomes a cross, click and drag
your mouse to create a new selection area. The new selection area
(scan job) you just created will also be listed in the Job List. You can
use the buttons in the Job List to delete or view detailed information
of that job.
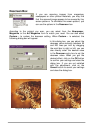
Hand Button
The Hand button is used to move the preview image within the
Preview Area. If the preview image is larger than the Preview Area,
you can first click this button, move the cursor onto the preview
image, then click and drag your mouse to move.
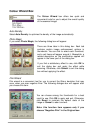
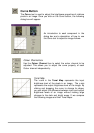
Zoom Button
Use the Zoom button to get a closer look at the preview image. Click
on the Zoom button to enlarge the preview image. When the cursor
turns into a magnifier, move it over the preview image, and then click
on it. You can zoom out from the image by first pressing and holding
“Alt” key on your keyboard and then clicking on the preview image.