


Polling
Polling allows someone to fax a document to you without having to make the call or
pay for it. There are several kinds of polling:
• Regular polling — Your fax retrieves a document from a remote fax machine.
• F-Code polling — Your fax retrieves a document stored as a file in the remote fax
machine. To do this, you must be communicating with another F-code-compatible
fax machine. For more information on F-Code polling, see “F-Code communication,”
pages 2.35–2.36.
• Continuous polling — Your fax continuously retrieves a document from any
remote fax machine at a designated time. For example, a hospital pharmacy can
use this to check on orders waiting in fax machines throughout the hospital.
For polling to work, the remote machine must also be set up to be polled. See the
remote machine’s operating instructions, if necessary.
Regular polling
To set up your machine for regular polling:
1
Make sure the document is inserted in the remote fax machine.
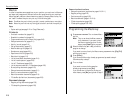
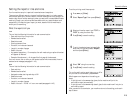
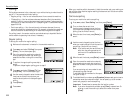
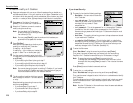
2
Press
MENU
and select “Polling” then press
[Enter]. The
LCD
shows (see right):
3
Enter the remote fax machine’s number by
either pressing a one-touch key, entering a
speed-dial number or using the numeric key-
pad.
4
To perform the regular polling now, skip to
step 8.
To perform delayed regular polling, go on to step 5.
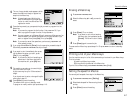
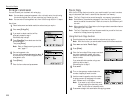
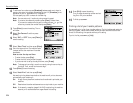
5
Press
MENU
and select “Delayed Tx” then
press [Enter]. The
LCD
shows (see right):
6
Use the numeric keypad to enter the date and
time (use the 24-hour format) when your
machine should perform the delayed regular
polling.
7
Press [Enter].
8
Press
START
.
When your machine polls for documents, it dials the number and, upon making con-
tact with the other machine, begins receiving the document as if the other machine
had placed the call.
Continuous polling
To set up your machine for continuous polling:
1
Press
MENU
, select “Cont Polling” and then press [Enter].
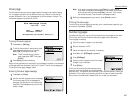
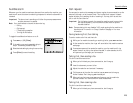
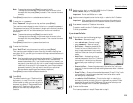
2
The
LCD
shows the current time:
Use the numeric keypad to enter the time
your machine should begin the continuous
polling. (Use the 24-hour format.)
3
When the start time is set, press [Enter] to
save it.
4
Use the numeric keypad to enter the time
when your machine should finish the continu-
ous polling. (Use the 24-hour format.)
Note: If you set the end time earlier than the
start time, the polling operation will
continue until the selected end time
tomorrow.
5
When the end time is set, press [Enter] to save it.
6
Enter the remote fax machine’s number by
either pressing a one-touch key, entering a
speed-dial number or using the numeric key-
pad.
If you are entering only one number for con-
tinuous polling, skip to step 8.
To add additional fax numbers for this opera-
tion, go on to step 7.
7
To add additional fax numbers, press [Broadcas] between each one to insert a
comma then enter the number as in step 2. You can specify up to 30 numbers
(and/or call groups) for continuous polling.
Important: Do not insert a comma after the last fax number.
Note: If you enter characters by mistake, press [Clear] to erase them. Or
press or of the cursor key to select the number then press
[Clear].
Beyond the Basics
2.22