


Chapter 2 Configuration and Installation
National Instruments Corporation 2-9 VXI-MIO Series User Manual
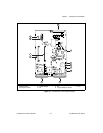
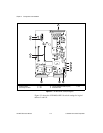
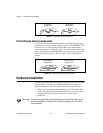
2. Remove or open any doors or covers blocking access to the
mainframe slots.
3. If you are installing your VXI-DAQ module into a D-size
mainframe, first install an appropriate support for C-size modules
in D-size mainframes.
4. Insert the VXI-DAQ module in the slot you have selected:
a. Align the top and bottom of the module with the card-edge
guides inside the mainframe.
b. Slowly push the VXI-DAQ module straight into the slot until
its plug connectors are resting on the backplane receptacle
connectors.
c. Using evenly distributed pressure, slowly press the VXI-DAQ
module straight in until it seats in the expansion slot.
d. Make sure the front panel of the VXI-DAQ module is even
with the front panel of the mainframe.
5. Tighten the retaining screws on the top and bottom edges of the
front panel.
6. Replace or close any doors or covers to the mainframe.
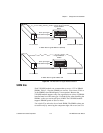
Software Installation
Regardless of your programming methodology, proper operation of
your VXI-MIO module depends on the correct installation of VISA on
your VXIbus controller.
If VISA is not installed, you must get this information from your
VXIbus controller manufacturer. If you have a National Instruments
VXIbus controller, contact our sales department for information on
obtaining the NI-VISA software at no charge.
If you are using NI-DAQ, refer to your release notes. Find the
installation section for your operating system and follow the
instructions given there.
If you are using LabVIEW, refer to your LabVIEW release notes to
install your application software. After you have installed LabVIEW,
refer to the NI-DAQ release notes and follow the instructions given
there for your operating system and LabVIEW.