


9-13
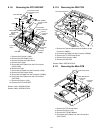
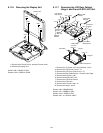
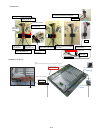
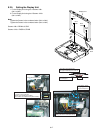
Preparations
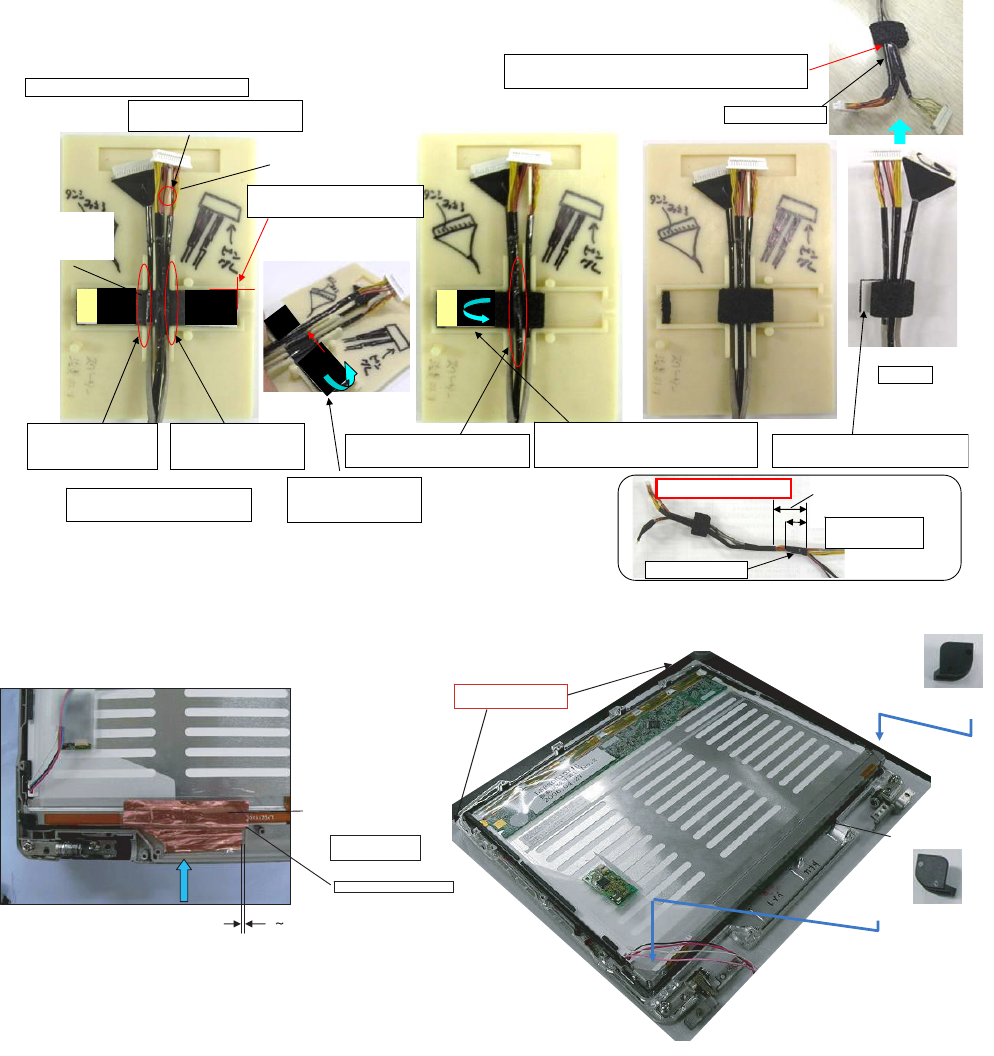
Assembly of LCD Unit
(19)
Put the pin side to the upper side.
Put the Connector bottom
in the rib on the jig.
Fit to the Moran edge and avoid running over.
The Cables should not be overlapped.
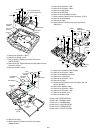
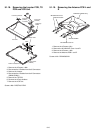
Attach the sheet matching
to the upper right.
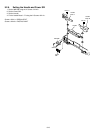
LCD cable Connect
Set the LCD signal
Cable on the
left guidegroove.
Set the 6-conductor
Cable on the
right guide groove.
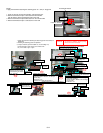
Remove the Release Paper
and set the Cable on it.
Pass it under the
13-conductor Cable
and attach it.
Set the 13-conductor Cable
on the center guide groove.
Remove the left Release Paper,
and attach it putting 13-conductor
Cable inside.
Leave the left Release Paper
without removing.
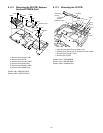
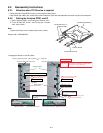
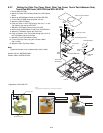
Finish
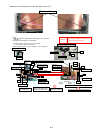
Non T/S model only
From the sheet end
24mm㫧2
Bundle all the
LCD Cables.
PET tapeWrap
PET tapeWrap
LCD CABLE
WP SHEET
Attach.
Attach the
Inverter
MIL Shierd
0 0.5mm
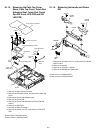
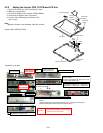
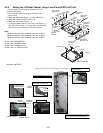
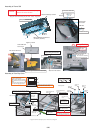
LCD Front Ass’y
LCD Drop Holder Insertion
LCD Drop Holder Insertion
* Notes:
1. Apply the load when attaching the parts. 20N to 30N (2 to 3Kgf)/cm2
Confirm that the LCD
Cushion is not wrapped.
Match to the LCD
edge and attach it.
Clearance : 2 mm or less