


Care and replacement
86 -
ENGLISH
Maintenance
■
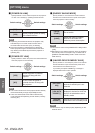
Lamp unit replacement procedure
Attention
Once a lamp unit has exceeded its lifespan of 4 000
z
hours (when [LAMP POWER] is set to [NORMAL]) the
projector can only be used for 10 minutes after turning
on. (
page 85)
Perform steps 20) to 23) of the procedure within 10
z
minutes.
If the projector is installed on the ceiling, do not carry out
z
any replacement procedure directly underneath the lamp
unit and keep your face away from the unit.
Do not open the top cover except when replacing the
z
lamp unit.
Do not switch the power on while the top cover is
z
opened.
Always replace the air lter and electrostatic lter
z
whenever replacing the lamp unit.
Install the lamp unit and the lamp cover securely.
z
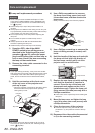
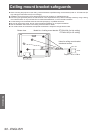
Press the <OFF> side of the <MAIN 1)
POWER> switch to turn off the power as
described in the “Switching off the power”
procedure (
page 30), remove the power
plug from the power outlet, and then after an
hour or more, check if the area surrounding
the lamp unit has cooled down.
Remove the video cable connected to the 2)
connecting terminal.
Attention
If you open the top panel fully, it may come into contact
z
with connectors such as the video cable which may result
in breakage of the video cable. Before opening the top
panel, be sure to remove the connected video cables,
etc.
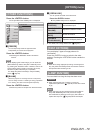
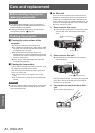
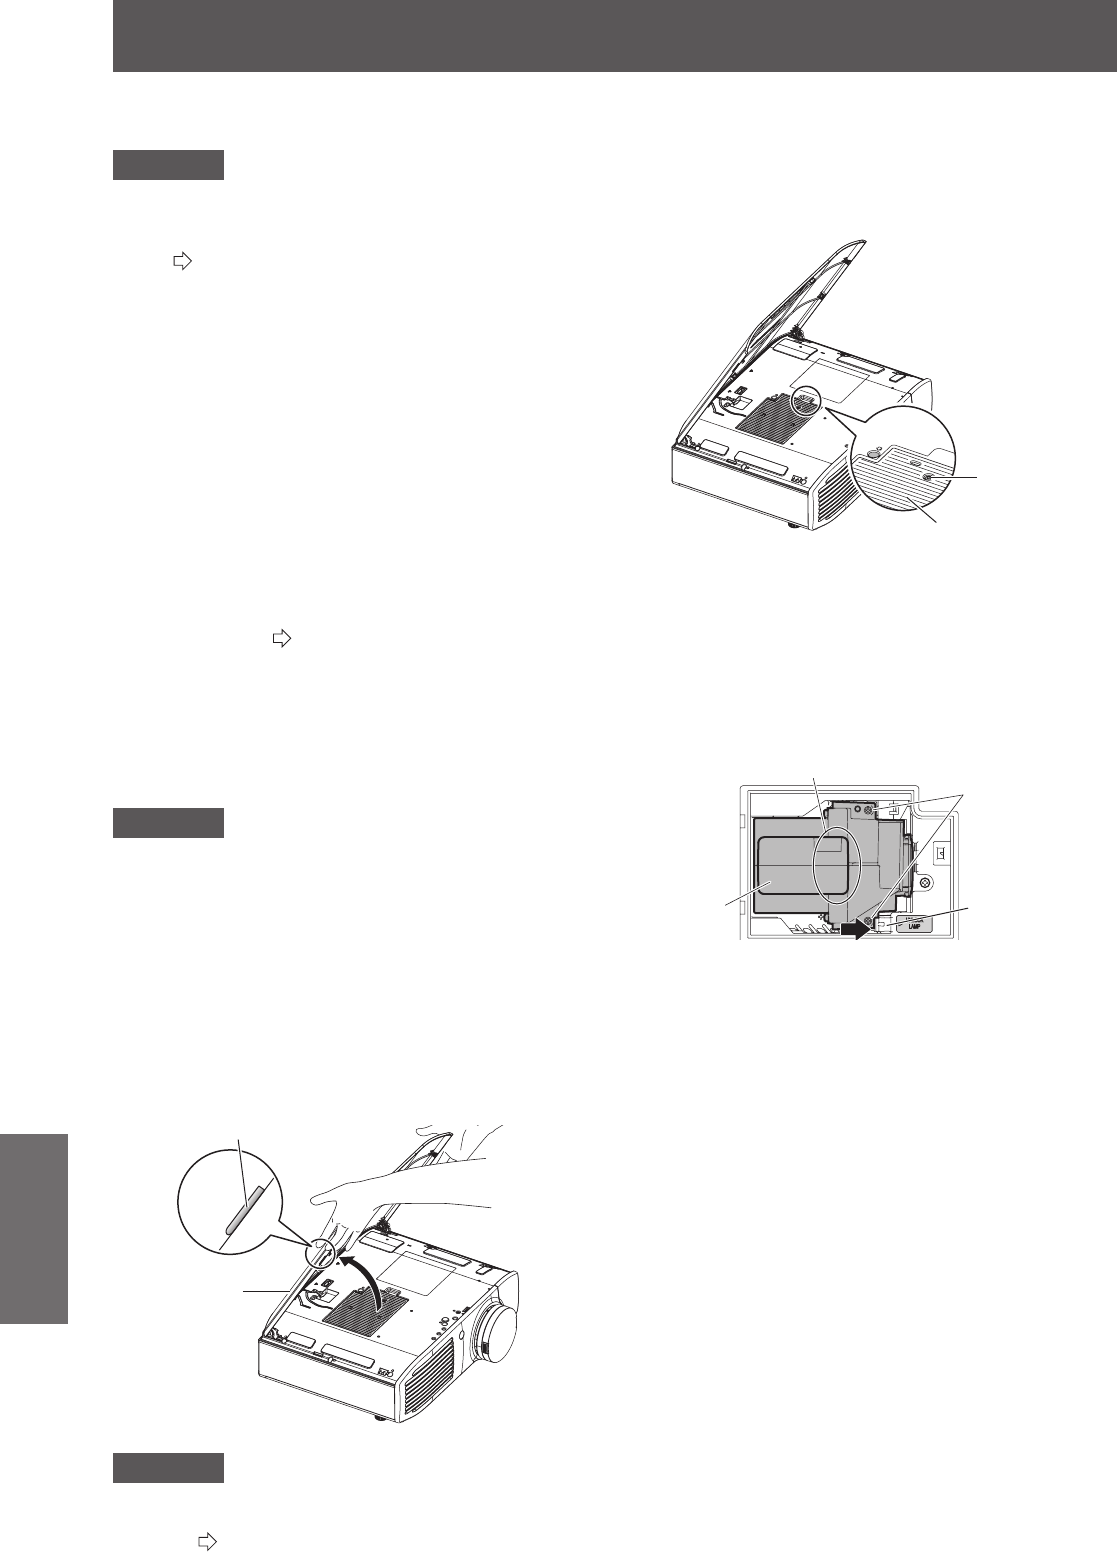
Hold the protrusions at the front corner 3)
of the top cover of the projector and
push up to open.
* When the projector is mounted on the ceiling, stand
at the lens side of the projector when opening/
closing the top cover.
Top cover
Protrusion
Attention
Be careful not to open the top panel too far. For what
z
to do if the top panel comes off, see ”Attaching the top
cover” (
page 88).
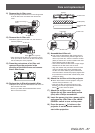
Use a Philips screwdriver to unscrew 4)
the lamp cover xing screw (one) until
it becomes loose, and then remove the
lamp cover.
* Slowly remove the lamp cover from the projector.
Lamp cover
Lamp
cover fixing
screw
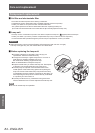
Use a Phillips screwdriver to unscrew the 5)
lamp unit xing screws (2 screws) until
loose.
Hold the handle of the lamp unit and with 6)
the lamp unit
lock held in the direction of
the black arrow, carefully pull it out of the
projector unit in a vertical motion.
モ
Lamp unit fixing
screws
Handle
Lamp unit lock
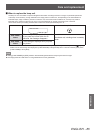
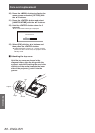
Replace the new lamp unit while making 7)
sure that the direction of insertion is
correct. Press the top of the lamp unit
downwards and make sure the unit is
installed securely. Tighten the lamp unit
xing screws (2 screws) securely with a
Phillips screwdriver.
Press down on the A part rmly when inserting the
z
lamp unit.
Mount the lamp cover, and tighten the lamp 8)
cover xing screw (one screw) securely with
a Phillips screwdriver.
Close the top cover of the projector.9)
Close the top cover using the reverse of the
z
procedure in 3), and press the center of the top
cover.
Reconnect the video cable disconnected 10)
in 2) to the connecting terminal.