Attaching the lens
28 - ENGLISH
Getting Started
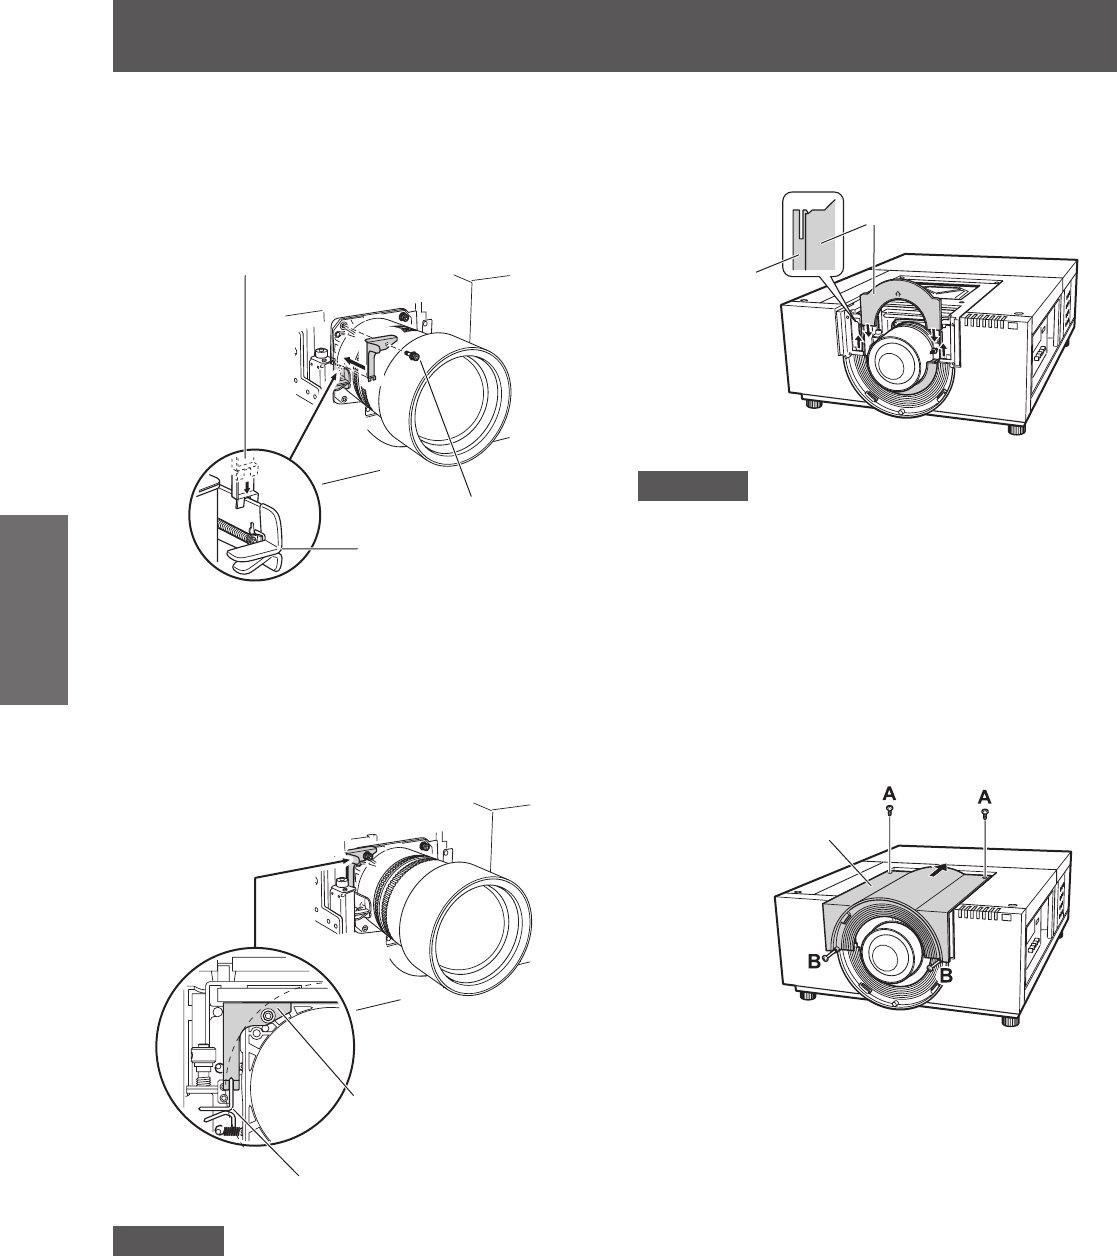
10) Secure the lens lock lever with the
lens lock lever xing bracket.
(i) Remove the lens xing screw and insert it to
the lens lock lever xing bracket.
(T0STF0045--)
Lens lock lever
Screw
Lens lock lever fixing bracket (Type SC-A)
(ii) Mount the lens lock lever xing bracket in the
location of the removed screw.
•■
Make sure that the lens lock lever xing
bracket is mounted to keep the lens lock
lever in the lock position. Conrm that the
lens lock lever xing bracket is mounted
properly shown in the gure.
Lens lock lever fixing
bracket (Type SC-A)
Lens lock lever
(T0STF0045--)
Attention
■
z
In order to x the attached lens securely, be sure to
mount the supplied lens lock lever xing bracket.
11) Insert the upper light-shielding plate
along with the guide to into combine
with the lower light-shielding plate.
Lower plate
Upper plate
Attention
■
z
When inserting the upper light-shielding plate, the
lower light-shielding plate should be lifted upward.
■
z
Make sure that the attaching direction of the light-
shielding plate is correct and set them properly.
■
z
If you cannot set the upper light-shielding plate
easily, move the projection screen from the center
to the upper side with the lens shift function in
advance.
12) Slide the lens attachment cover
and x it with two screws A and two
screws B.
Lens attachment cover


