– 12 –
Chapter 2 Description of Parts — Camera module
- 3/8-16 UNC
2 Fan outlet
Fan outlet for dissipating heat. Do not block this when the camera is in use.
3 Recording module release lever
Lever for removing the recording module (optional) from the camera module.
4 Accessory mounting holes
For attaching accessories.
fMounting hole size
- 1/4-20 UNC (screw length 5.5 mm or shorter)
5 USER button (<4>)
User-selected functions can be assigned to this button. Pressing the button performs the assigned function.
6 Focus hook
Indicate the focal plane of the MOS sensor. It provides a reference for measuring the accurate focal length from the subject.
7 <VF> terminal
Terminal for connecting the HD viewnder AU-VCVF1G (optional).
8 <VF SDI> terminal
Output terminal for 3G/HD SDI. Displays the video equal to the viewnder display.
For the cable to connect to this terminal, prepare a double-shielded cable equivalent to 5C-FB.
9 <DC OUT> terminal
This is the DC12 V output terminal. It provides a maximum current of 1 A.
10 <MIC IN> terminal
Terminal for connecting a microphone.
11 <LENS> terminal
Terminal for connecting a lens cable. For details, refer to the Operating Instructions for the lens.
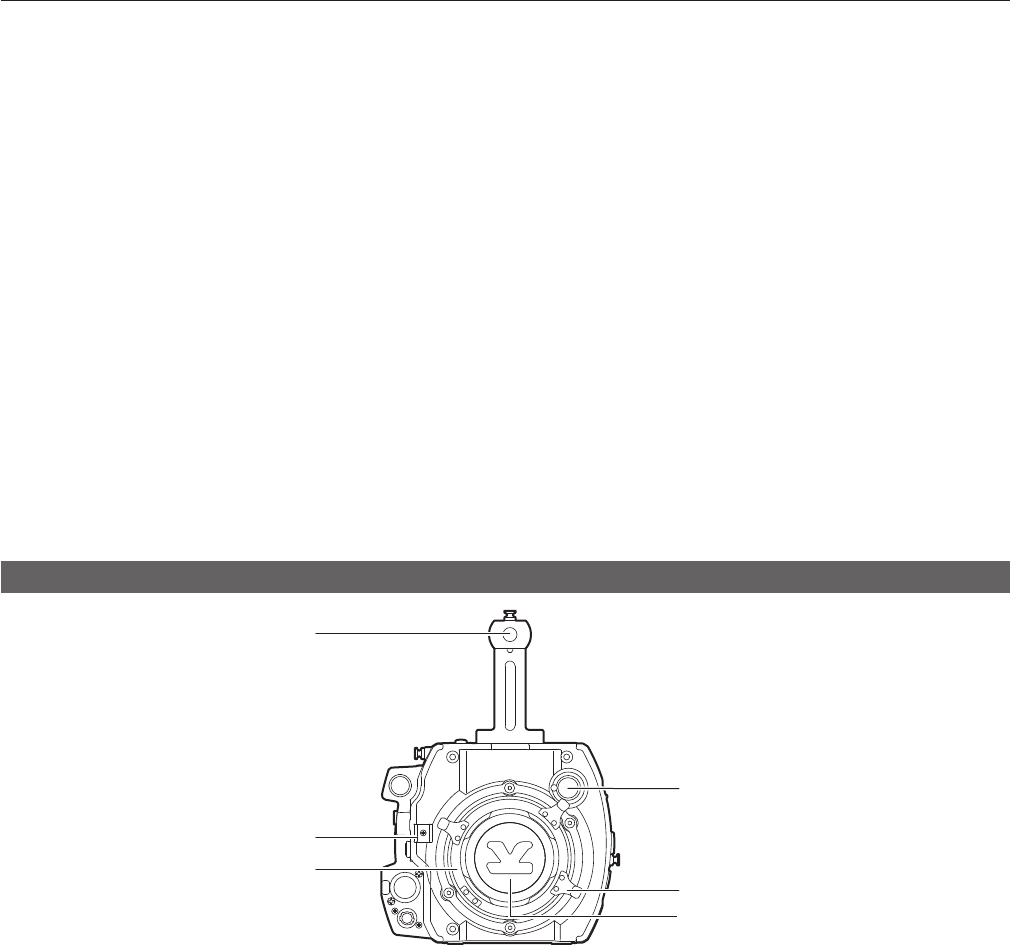
Front
1
2
3
4
5
6
1 Accessory mounting holes
For attaching accessories.
fMounting hole size
- 3/8-16 UNC (screw length 5.5 mm or shorter)
2 Lens cable /microphone cable clamp
Clamp for securing the lens and microphone cables.
3 Lens mount
Holds the lens.
4 <FILTER> dial
Selects a lter which suits the illumination of the subject.
<1><CLEAR>: Does not use the ND lter.
<2><0.6ND>: Reduces the amount of light entering the MOS sensor to 1/4.
<3><1.2ND>: Reduces the amount of light entering the MOS sensor to 1/16.
<4><1.8ND>: Reduces the amount of light entering the MOS sensor to 1/64.
5 Lens lever
After mounting the lens to the lens mount, tighten the lever to secure the lens.
6 Mount cap
Attach the cap when the lens is not mounted.


