C. Viewing With The VersaCam IC-360
There are 3 real-time viewers available on the VersaCam homepage: the “Default Viewer”, the
“720×468 Viewer” and the “Server Push Viewer.” An administrator may set any viewer as a first
user interface. A connected user may monitor real-time images through the administrator-selected
main viewer or select another.
1) Real-time monitoring through the default viewer
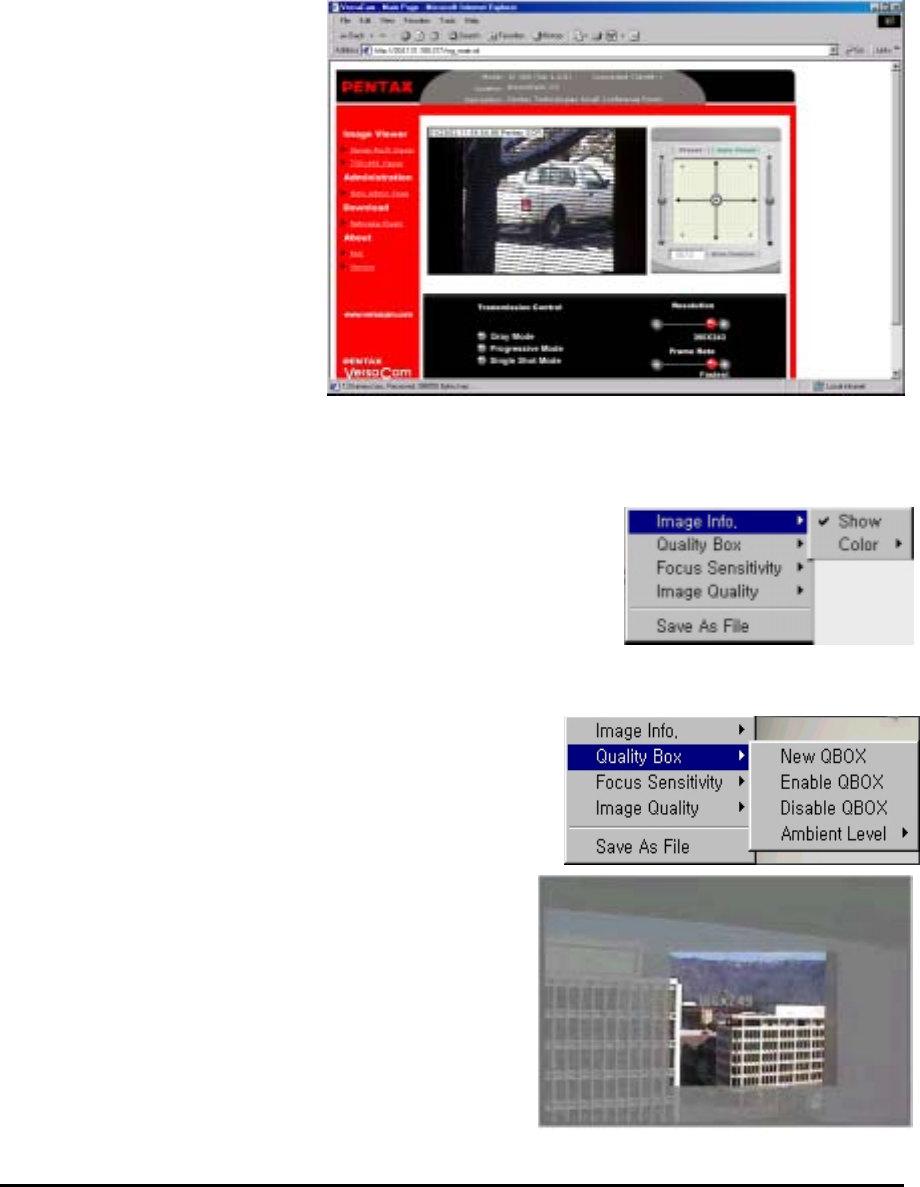
The viewer page is composed of
three areas: 1) The real-time
image screen, 2) The Java applet
Pan/Tilt/Preset control panel, and
3) The video control section at
the bottom of page.
(1) Useful Pop-up Menu on the
Real- time monitoring screen
A small window including 5
functions appears when a user
clicks the right mouse button
over the displayed image.
Users who have the authority can
access functions such as ‘Image
Info’, ‘Quality Box’, ‘Focus
Sensitivity’, and ‘Image Quality’.
Video Information Setting
This page allows changing the color of the time shown on
the left top of the image, or choosing not to show the time at all.
Configuration of the High Quality Image Area
You can overcome insufficient network bandwidth by using
this function. Click the right mouse button on any place on
the picture and drag to select a desired area. By selecting
only a portion of the image for high contrast, the remaining
portion of the image is sent at low contrast and is highly
compressed.
If you want to set a new quality area, click on ‘New
QBOX’. Place and click your cursor where you want to
start and then drag the mouse and click again where you
want the box to stop. You can also use the existing area
to focus again by clicking ‘Enable QBOX.’ ‘Disable
QBOX’ cancels the function. The image-activated
high-quality area function is as below.
The user may set the quality of the “low contrast area”
with ‘Ambient Level’. If you select ‘Level 1’, the quality
VersaCam IC-360 User’s Guide
15
