CHAPTER 2: OPERATION 33
Note about “Reset to Defaults”
You can click Reset to Defaults to save time configuring the destination association data when
the Paragon user ports and the router’s destination ports are associated with each other based on
the same port numbers. The command has these characteristics:
• All existing destination association data is cleared and replaced by new data.
• All user ports will be associated with destination ports based on identical port numbers. That
is, user port 1 is associated with destination port 1, user port 2 with destination port 2, user
port 3 with destination port 3, and so on.
• The number of associated ports is determined according to the number of user ports.
• Port type is set to audio by default.
Exporting Router Configuration
After creating or changing the router association data, involving source and destination
associations, you should save the data by exporting it for future use, or all association settings or
changes you made will be lost when you exit from Paragon Manager or disconnect the Paragon
system.
1. Choose Router > Export Router Configuration. The Select destination path dialog appears.
2. Ensure the file type shows XML Files.
3. Navigate to appropriate location, specify the filename and click Save. It is recommended to
name the file based on the Paragon switch’s name for easy identification of the file when
importing the data in the future.
Note: All characters that are present in the File name filed are regarded as the filename so
you should remove unnecessary characters, including the extension, from this field when
necessary.
Importing Router Configuration
Paragon Manager does not automatically import any previously-saved router association data so
you must either create the router association data from the scratch or import existing router
association data. This section explains how to import existing data.
1. Choose Router > Import Router Configuration. The Select File to Import dialog appears.
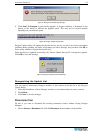
2. A confirmation message appears. Click Yes to import the selected data or No to cancel.
3. Ensure the file type selects XML Files.
4. Navigate to where the router association data specific to the Paragon switch is stored, select
the appropriate file and click Open.
Note: The router association data is Paragon switch-specific. If you import any router
association data that is not for the connected Paragon switch, an error message appears,
indicating that the UMT ID is different.
Checking Audio/Video Routing Results
Paragon Manager has a log panel at the bottom to display Paragon Manager activity. When
Paragon Manager makes the router route audio/video signals based on the association data, the
log panel records the activity and outcome.


