


12
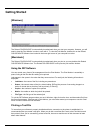
Setting Up the Roland COLORCHOICE
1. Double-Click on Roland COLORCHOICE.
2. Select a printer model.
3. Click
Next
.
4. Select the port type you would like to use. You may choose USB or TCP/IP port.
5. Click
OK
.
Creating a Desktop Printer
1. From the Apple menu select Chooser and then highlight AdobePS.
2. Locate your PostScript printer. It should say <Printer Name>@Computer, “Computer” is the name of
your Macintosh.
3. Click
Create
. You are prompted to select a PPD (PostScript printer description).
4. Click
OK
.
5. Select Standard Memory.
6. Click
OK
.
Uninstalling the Software [Macintosh]
1. Quit the Roland COLORCHOICE Software.
2. Drag the Roland COLORCHOICE 4 or RCC for ColorCAMM Folder into the Trash.
3. Open the System folder.
4. From the Preferences folder, drag the files named ‘Roland COLORCHOICE Preferences’ and ‘Roland
COLORCHOICE Prefs’ or ‘RCC for ColorCAMM Preferences’ and ‘RCC for ColorCAMM Prefs’into the
Trash.
5. Locate and open the ‘Extensions’ folder. Drag the spooler file into the Trash. The Spooler file is named
according to your printer, and appears as ‘Am_<printer name>’, depending on the printer installed. From
the ‘Printer Descriptions’ folder, located within the ‘Extensions’ folder, drag the PPD files, named
according to your output device, into the Trash.
6. Restart your computer.
7. Hold down the Option key while you empty the Trash. The software is now uninstalled.