


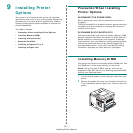

Installing Printer Options
9.5
5
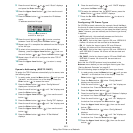
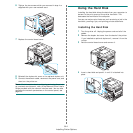
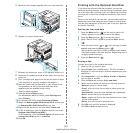
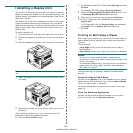
Fasten the four screws supplied with your new hard disk.
6
Replace the control board cover.
7
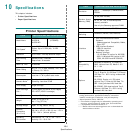
Reinstall the duplex-slot cover or the optional duplex unit.
8
Reconnect the power cord and printer cable, and turn the
printer on.
9
Print a configuration page from the control panel to check
if the hard disk is correctly installed. See page 6.1.
10
Now you need to set the hard disk in your printer driver.
The procedure for setting the hard disk may differ
depending on the selected printer driver.
Take the following steps:
11
Click the Windows
Start
menu.
For Windows 9x/Me/NT4.0/2000, select
Settings
and
then
Printers
.
12
For Windows XP/2003, select
Printers and Faxes
.
13
Select the
Samsung
ML-3560 Series
PCL 6
printer icon
or
Samsung
ML-3560 Series
PS
printer icon.
14
Right-click on the printer icon and select
Properties
.
15
In PCL 6 Properties, click the
Printer
tab and then check
Optional Hard Disk Drive(HDD)
.
In PS Properties, click the
Device Option
tab and set the
Printer Hard Disk
option to
Installed
.
16
Click
OK
.
Printing with the Optional Hard Disk
If you have the optional hard disk installed, you can use
advanced printing features, such as storing or spooling a print
job to the hard disk, proofing a job, and specifying of printing
a private job in the printer properties window on your printer
driver.
Once you stored files in the hard disk, you can easily reprint or
delete the stored files using the control panel of your printer.
You can also manage all of the print jobs in the print queue of
the printer hard disk.
Setting the time and date
1
Press the
Menu
button ( ) on the control panel until
“Setup” appears on the bottom line of the display.
2
Press the
Enter
button ( ) to access the menu.
3
When “Date & Timet” appears, press the
Enter
button
().
4
Press the scroll button ( or ) until the digit you want
appears and press the
Enter
button ( ).
You can enter from 2000 to 2065 in the year input section.
The cursor moves to the next position. Repeat step 4 until
all digits appears correctly.
5
Press the
Enter
button ( ).
Storing a Job
You can store jobs in the installed hard disk.
1
Open the file you want to store.
2
Select
Printer
from the
File
menu. The Print window is
displayed (It may look slightly different depending on your
application.)
3
Click
Properties
. If you see
Setup
,
Printer
or
Options
,
click the button instead.
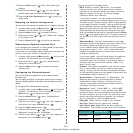
4
Click the
Extra
tab and click
Print and Hold
.
5
Select the Print Mode you want from the drop-down list.
•
Normal
: prints in normal mode.
•
Proof
: prints the first file and after a pause prints the
next file.
•
Confidential
: stores the files secured with a password.
•
Store
: stores the file to the hard disk.
•
Spool
: spools the file into the hard disk and prints it from
the hard disk queue.
•
Delay
: prints the file at a specified time.
6
Click
OK
until the Print window is displayed.
7
Click
OK
or
Print
to start printing.