


60 | CHAPTER 8 – REPLACING YOUR UF55/UF55W PROJECTOR LAMP
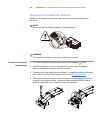
5. If you use a projector padlock, make sure that you remove it from the locking loop.
If you need access to the projector locking screw, loosen the wingnut and slide the
projector all the way back, away from your interactive whiteboard’s screen, and
then re-tighten the wingnut.
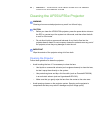
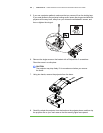
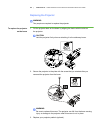
6. Remove the single screw on the bracket with a Phillips® No. 2 screwdriver.
Place the screw in a safe place.
CAUTION
The projector may drop freely if it is moved around when you remove
the screw.
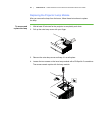
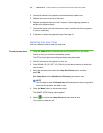
7. Using two hands, remove the projector from the boom.
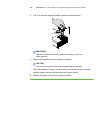
8. Carefully unhook the projector from the hooks on the projector boom, and then lay
the projector flat on your work area so that the warning lights face upward.