


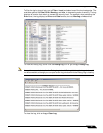

Using NetExtender
38
SonicWALL SSL VPN 5.0 User Guide
net use drive-letter\\server\share password /user:Domain\name
For example to if the drive letter is z, the server name is engineering, the share is docs, the
password is 1234, the user’s domain is eng and the username is admin, the command would
be the following:
net use z\\engineering\docs 1234 /user:eng\admin
Step 5 To disconnect a network drive, enter a command in the following format:
net use drive-letter: /delete
For example, to disconnect network drive z, enter the following command:
net use z: /delete
Step 6 To map a network printer, enter a command in the following format:
net use LPT1 \\ServerName\PrinterName /user:Domain\name
For example, if the server name is engineering, the printer name is color-print1, the domain
name is eng, and the username is admin, the command would be the following:
net use LPT1 \\engineering\color-print1 /user:eng\admin
Step 7 To disconnect a network printer, enter a command in the following format:
net use LPT1 /delete
Step 8 To launch an application enter a command in the following format:
C:\Path-to-Application\Application.exe
Step 9 For example, to launch Microsoft Outlook, enter the following command:
C:\Program Files\Microsoft Office\OFFICE11\outlook.exe
Step 10 To open a Web site in your default browser, enter a command in the following format:
start http://www.website.com
Step 11 To open a file on your computer, enter a command in the following format:
C:\Path-to-file\myFile.doc
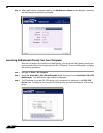
Step 12 When you have finished editing the scripts, save the file and close it.
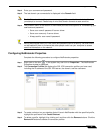
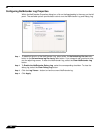
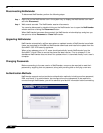
Configuring Proxy Settings
SonicWALL SSL VPN supports NetExtender sessions using proxy configurations. Currently,
only HTTPS proxy is supported. When launching NetExtender from the Web portal, if your
browser is already configured for proxy access, NetExtender automatically inherits the proxy
settings.
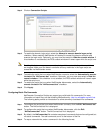
To manually configure NetExtender proxy settings, perform the following tasks.
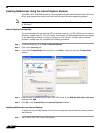
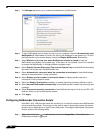
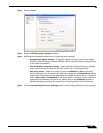
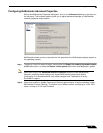
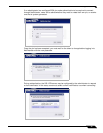
Step 1 Right click on the icon in the task bar and click on Preferences... The NetExtender
Preferences window is displayed.