


Adjusting the Printer Picture Quality
60
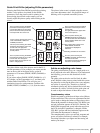
Guide Print Function
Selecting the Guide Print-RGB or Guide Print-DLGm
layout before printing enables you to print a guide
picture that has each of the RGB or DLGm parameters
changed.
Guide pictures can be printed on UPC-X46 series, UPC-
X45 series, and UPC-X34 series paper.
The following is an example of a guide picture printout.
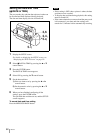
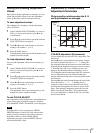
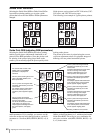
Guide Print-RGB (adjusting RGB parameters)
Selecting the Guide Print-RGB layout before printing
enables a guide picture (adjustment simulation) to be
printed for the RGB parameters. Since the picture used
for printing is the picture being played back on the
camera, you can actually adjust the picture quality while
looking at the picture.
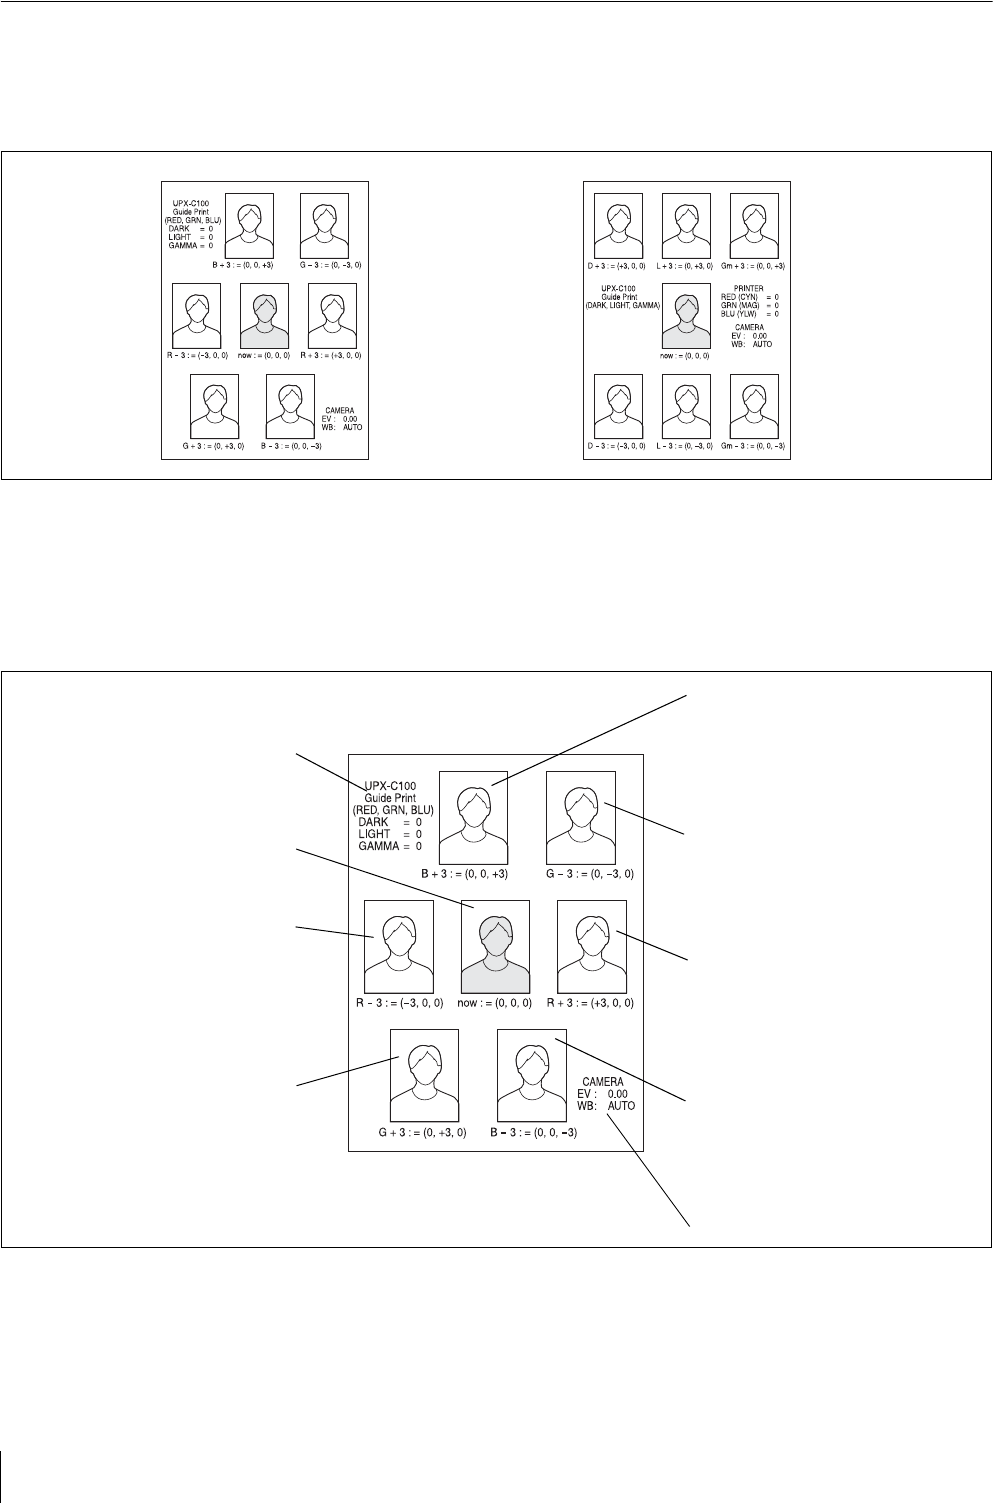
The picture in the center is printed using the current
color tone adjustment values. Six playback images of
differing color are printed around this picture.
The values below each of the pictures are for the R, G,
and B parameters. If, for example, you want to use the
color tone on the top left in the figure above, set the B
parameter to +3 because (RED, GREEN, BLUE) = (0, 0,
+3).
If you want to adjust (RED, GREEN, BLUE) = (0, 0, +3)
further, set the B parameter to +3, and then print another
Guide Print-RGB. This will give you a simulation for
each color variation with (RED, GREEN, BLUE) = (0,
0, +3) in the center.
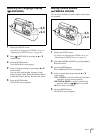
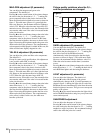
The current state of each of the
DARK, LIGHT, and GAMMA
parameters is displayed for
reference.
This is a picture showing the RED
parameter decreased by 3 from the
current state.
The subject appears a little darker
than in the current picture, and
overall the picture appears slightly
cyan.
This is a picture showing the
GREEN parameter increased by 3
from the current state.
The white saturated parts remain
white and do not change. The
subject appears a little lighter than in
the current picture, and slightly
green.
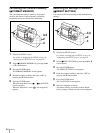
This is a picture showing the current
state of the RED, GREEN, and
BLUE parameters.
This is a picture showing the BLUE
parameter increased by 3 from the
current state.
The white saturated parts remain white
and do not change. The subject
appears a little lighter than in the
current picture, and slightly blue.
This is a picture showing the BLUE
parameter decreased by 3 from the
current state.
The subject appears a little darker than
in the current picture, and overall the
picture appears slightly yellow.
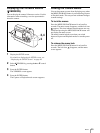
This is a picture showing the RED
parameter increased by 3 from the
current state.
The white saturated parts remain white
and do not change. The subject
appears a little lighter than in the
current picture, and slightly red.
This is a picture showing the GREEN
parameter decreased by 3 from the
current state.
The subject appears a little darker than
in the current picture, and overall the
picture appears slightly magenta.
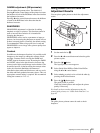
Shooting conditions of the camera