


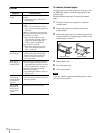


Troubleshooting
71
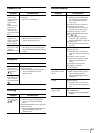
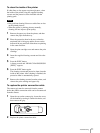
To clean the inside of the printer
If white lines or dots appear on printed pictures, clean
the inside of the printer using the supplied cleaning
cassette and the protective sheet included with the
printing pack.
Notes
• Only perform cleaning if there are white lines or dots
on the printed pictures.
• When the printer is printing pictures normally,
cleaning will not improve print quality.
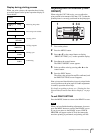
1
Remove the paper tray from the printer, and then
remove the paper from the tray.
2
Place the protective sheet in the tray so that the
unprinted side is facing up and the arrows on the
bottom of the tray and back of the sheet are pointing
in the same direction.
3
Open the print cartridge cover and remove the print
cartridge.
4
Insert the supplied cleaning cassette and close the
cover.
5
Press the EXEC button.
A buzzer sounds and “HEAD CLEANING/PUSH
[EXEC]” appears.
6
Press the EXEC button again.
The cleaning cassette and protective sheet clean the
inside of the printer. After cleaning is finished, the
protective sheet is automatically ejected.
7
Remove the cleaning cassette from the printer, and
reinsert the print cartridge and paper tray.
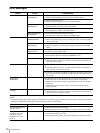
To replace the printer connection cable
The camera grip must be removed from the camera
before the printer connection cable can be disconnected
from the camera.
1
Open the cap on the camera grip, loosen the screw
on the bottom by turning it counterclockwise, and
then remove the grip.
2
Replace the printer connection cable.