


2
Getting Set Up
2-16
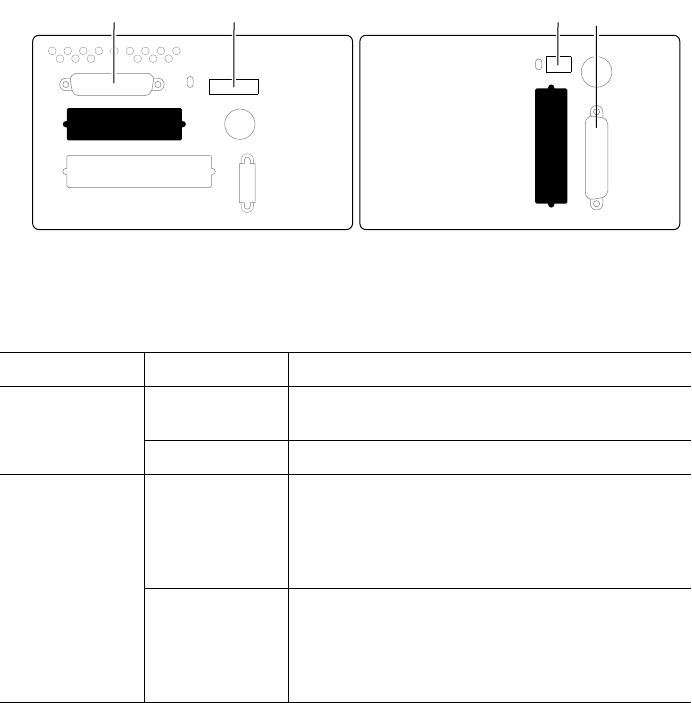
Phaser 220i and Phaser 220e Color Printers
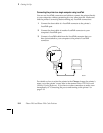
Serial connection
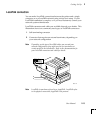
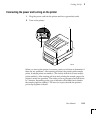
1.
Connect a serial interface cable to your computer and to the
printer's serial port. Use a null-modem cable (if you need to order
a cable, see the supplies information sheet that is shipped with the
printer).
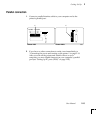
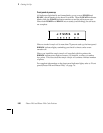
2.
Set the rear panel DIP switch(es) for the baud rate you want. The
following table lists the switch settings.
Baud rate settings for Phaser 220i and Phaser 220e
Printer Baud rate Switch setting
Phaser 220i Variable,
9600 default
Switch 7
down
Fixed, 1200 Switch 7
up
Phaser 220e Variable,
9600 default
Setting Switches 2, 3, and 4
down
enables the
variable baud rate and sets other printer
functions to default values. Refer to Chapter 7
for details on all printer functions affected by the
rear panel DIP switches.
Fixed, 1200 Switch 2
up
, and switches 3 and 4
down
. This
setting also turns off color adjustment and
sample prints. Refer to Chapter 7 for details on
all printer functions affected by the rear panel
DIP switches.
8869-13
Phaser 220i
1
Phaser 220e
1
2 2