


6Printing
Xerox Phaser 3200MFP 6-5
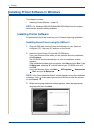
Selecting the Xerox Network Printer Port
To print to the Xerox Network Printer port, you need to select it in the printer
driver.
1. From the Windows Start menu, selecting Settings and then Printer to
open the Printer folder.
In Windows XP(32/64bit)/2003(32/64bit), select Start and then Printers
and Faxes.
For Windows Vista, select Start Control Panel Hardware and
Sound Printers.
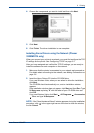
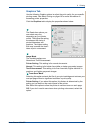
2. Right-click on the your printer name icon and select Properties from
the pop-up menu.
3. In Windows 98/Me, click the Details tab.
In Windows 2000/XP(32/64bit)/2003(32/64bit)/Vista, click the Ports tab.
4. Click Add Port.
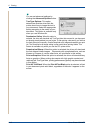
5. In Windows 98/Me, click Other, and select Standard TCP/IP Port. Click
OK.
In Windows 2000/XP(32/64bit)/2003(32/64bit)/Vista, select Standard
TCP/IP Port and click New Port.
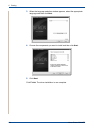
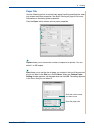
6. The Network Printer Port Wizard window appears. Select the method for
detecting the network interface card of your machine and enter the asso-
ciated address, if necessary. Click Next.
You can find a print server by entering the printer’s IP address, MAC
address, or IPX/SPX address. To search through all of the interface cards
connected to the network, select Auto Detection on the network.
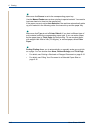
7. If you selected Auto Detection on the network, the system detects all of
the print servers and displays a list. Select your printer you want to use
then click Next.
8. Type a port name to identify the new printer and click Finish.
9. The selected port displays on the print port list. Click OK or Close.
10. You are finished. To send a job to the network printer, select the printer
from the application programme.
NOTE: The printer that has been installed will become the default printer.