


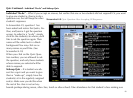
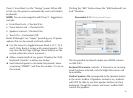


3. Click a student name (either list) and click the “>” or
“<” button to transfer the student. Note that you can
only select one student at a time.
4. A transferred student will be placed in the first avail-
able seat. (Use the “Add/Edit Classes” tab of the
GradeBook to switch seats.)
NOTE: You may want to create a mock class called
“Transferred Students” and rather than deleting a student,
transfer him/her to this class. If that sutdent ever returned
to a class, you would still have their data.
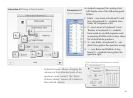
Part 3 – Export Class Info
1. Select a class you wish to export.
2. Select “Student Progress” to export individual student
info. (Hold down the ⌘ key to select more than one
student at a time.)
OR
3. Select “Class Report” to export class information. (You
can only export one class at a time.)
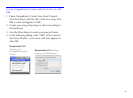
4. The name of the exported file can be changed in the
“Export Filename” box OR after you click the “Ex-
port” button. The resulting file is a text file (.txt) and
can be used in any application that supports such a
format, including any word processor or spreadsheet
program.
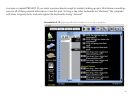
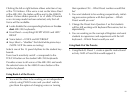
Part 4 – Backup/Restore/Reset Classes
✦
The Backup feature makes a complete copy of y our
entire MIE GradeBook. Click the “Create Backup” but-
ton.
✦
Select where you would like to save this backup.
✦
The Restore feature allows you to select specific
classes from an MIE Backup.
✦
Click the “Select a Backup Folder” and navigate to
the location where you have previously saved an MIE
Backup.
✦
Select the class(es) you wish to restore.
✦
The Reset feature erases attendance, quiz scores, and
notes for every student. Names and seating charts are
NOT affected.
✦
Click the “Show” button to display your current class
list.
✦
Select the class(es) you wish to restore.
✦
Click the “Reset Class” – you’ll be asked again if you
are sure.
NOTE: Resetting a class cannot be undone.
56