


3
I
NSTALLING
M
EDIA
M
ODULES
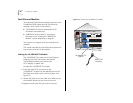
Your CoreBuilder
®
3500 system is shipped with the
system processor installed but with no modules
installed. Protective blank faceplates cover the
module installation slots. To prepare the system for
configuration, read these sections:
■ Avoiding ESD Damage
■ Installing a Module
For specific module overview, LED status information,
installation instructions, and diagnostics information,
see the module installation guide that is shipped with
each module.
For information on replacing the system processor,
see Appendix B.
Avoiding ESD Damage
ESD occurs when a module is improperly handled.
ESD can damage components on a module, causing
complete or intermittent failures.
To prevent ESD-related damage, handle the module in
the following manner:
■ Always wear an ESD wrist strap, ensuring that it is
appropriately grounded and makes good skin
contact.
■ Keep the module in its antistatic shielded bag until
you are ready to install it.
■ Always handle the module by its edges.
■ Do not touch the pins, leads, or solder
connections.
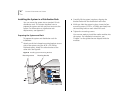
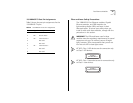
Installing a Module
This installation procedure takes only a few minutes
to complete. You may need a small flat-bladed
screwdriver to install the module.
CAUTION: When you are handling modules, 3Com
recommends that you always use a wrist strap
connected to a proper ground to prevent the module
from being damaged by ESD. Also, when you are not
using the module, store it in an antistatic bag.
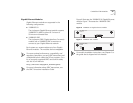
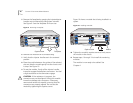
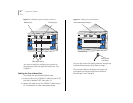
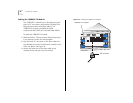
To install a module in the system:
1
Put on the ESD wrist strap.
2
Discharge yourself of static electricity by touching a
mounting screw located on the system’s mounting
bracket.
If your system is installed on a table, touch the
system’s back panel.
3
Choose the slot where you want to insert the module.
4
Loosen the two captive screws on the faceplate that
covers the selected slot. Use a small, flat-bladed
screwdriver if necessary.