


NetLinx Security with a Terminal Connection
109
NI-3101-SIG Signature Series NetLinx Integrated Controller
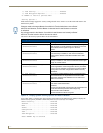
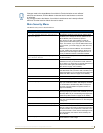
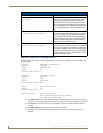
Main Security Menu
The Main Security menu is described below:
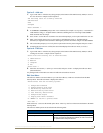
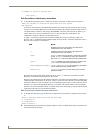
Changes made to the target Master from within the Terminal window are not reflected
within the web browser, until the Master is rebooted and the web browser connection
is refreshed.
Any changes made to the Master, from within the web browser are instantly reflected
within the Terminal session without the need to reboot.
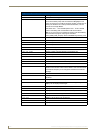
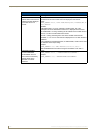
Main Security Menu
Command Description
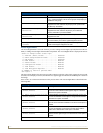
1) Set system security options for
NetLinx Master
This selection will bring up the Security Options Menu
that allows you to change the security options for the
NetLinx Master (refer to theSecurity Options
Menu section on page 102 for details). These are
"global" options that enable rights given to users and
groups. For instance, if you want to disable Telnet secu-
rity for all users, you would simply go to this menu and
disable
Telnet security for the entire Master. This would allow
any user, whether they have the rights to Telnet or not.
These options can be thought of as options to turn on
security for different features of the NetLinx Master.
2) Display system security options
for NetLinx Master
This selection will display the current security options for
the NetLinx Master.
3) Add user This selection will prompt you for a username and
password for a user you would like to create. After the
user is added, you will be taken to the Edit User Menu to
setup the new users rights (see theEdit User
Menu section on page 103 for details).
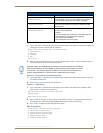
4) Edit user This selection will prompt you select a user. Once you
have selected the user you want to edit, it will take you to
the Edit User Menu so you can edit the user's rights (see
theEdit User Menu section on page 103 for details).
5) Delete user This selection will prompt you select a user to delete.
6) Show the list of authorized users This selection displays a list of users.
7) Add group This selection will prompt you for a group name fro a
group you would like to create. After the group is added,
you will be taken to the Edit Group Menu to setup the
new users right (see theEdit Group Menu section on
page 105 for details).
8) Edit group This selection will prompt you select a group. After
selecting the group you want to edit, it will take you to the
Edit Group Menu so you can edit the group's rights (see
theEdit Group Menu section on page 105 for details).
9) Delete group This selection will prompt you select a group to delete. A
group can only be deleted if there are no users assigned
to that group.
10) Show list of authorized groups This selection displays a list of groups.
11) Set Telnet Timeout in seconds This selection allows you to set the time a telnet session
waits for a user to login. When a Telnet client connects to
the NetLinx Master, it is prompted for a username. If the
client does not enter a users name for the length of time
set in this selection, the session will be closed by the
NetLinx Master.
12) Display Telnet Timeout in seconds This selection allows you to display the time a telnet
session waits for a user to login.