2-52-5
2-52-5
2-5
ASUS TW510-E2ASUS TW510-E2
ASUS TW510-E2ASUS TW510-E2
ASUS TW510-E2
2.3.22.3.2
2.3.22.3.2
2.3.2
Installing the CPUInstalling the CPU
Installing the CPUInstalling the CPU
Installing the CPU
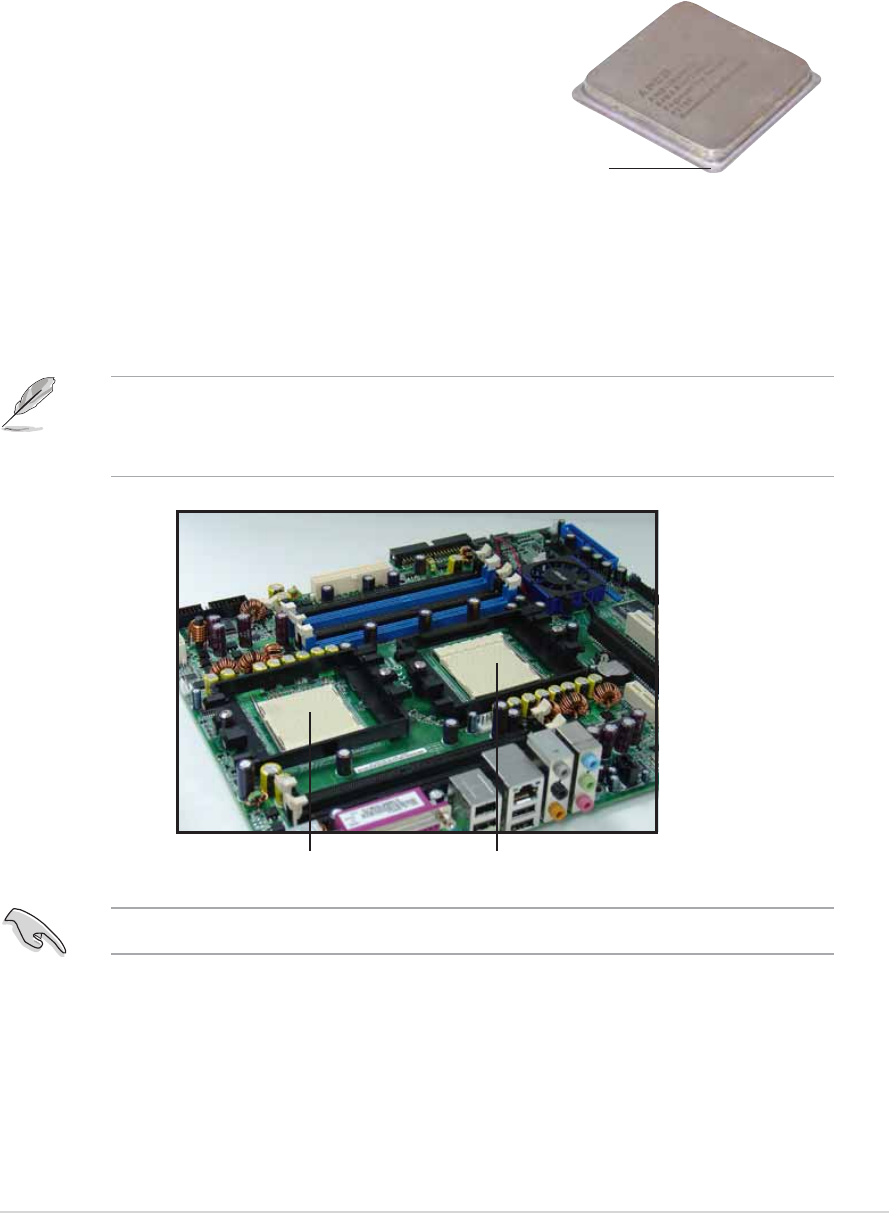
Note in the above illustration that the CPU has a notched corner. This
corner indicates the processor Pin 1 that should match a specific corner of
the CPU socket.
2.3 Central Processing Unit (CPU)
2.3.12.3.1
2.3.12.3.1
2.3.1
OverviewOverview
OverviewOverview
Overview
The motherboard comes with dual surface mount 940-pin Zero Insertion
Force (ZIF) sockets designed for AMD Opteron™ 64 processors.
The 128-bit-wide data paths of these processors can run applications
faster than processors with only 32-bit or 64-bit wide data paths.
Take note of the notched corner on
the CPU. This corner should match a
specific corner on the socket to
ensure correct installation.
Notched cornerNotched corner
Notched cornerNotched corner
Notched corner
Before installing the CPU, remove the chassis fan attached to the inner
side of the rear panel to allow enough space for the installation. Refer to
section “2.10 Removable components” for details.
Socket for CPU2Socket for CPU2
Socket for CPU2Socket for CPU2
Socket for CPU2
Socket for CPU1Socket for CPU1
Socket for CPU1Socket for CPU1
Socket for CPU1
If installing only one CPU, use the CPU socket marked CPU1.


