Chapter 2: Hardware setupChapter 2: Hardware setup
Chapter 2: Hardware setupChapter 2: Hardware setup
Chapter 2: Hardware setup
2-122-12
2-122-12
2-12
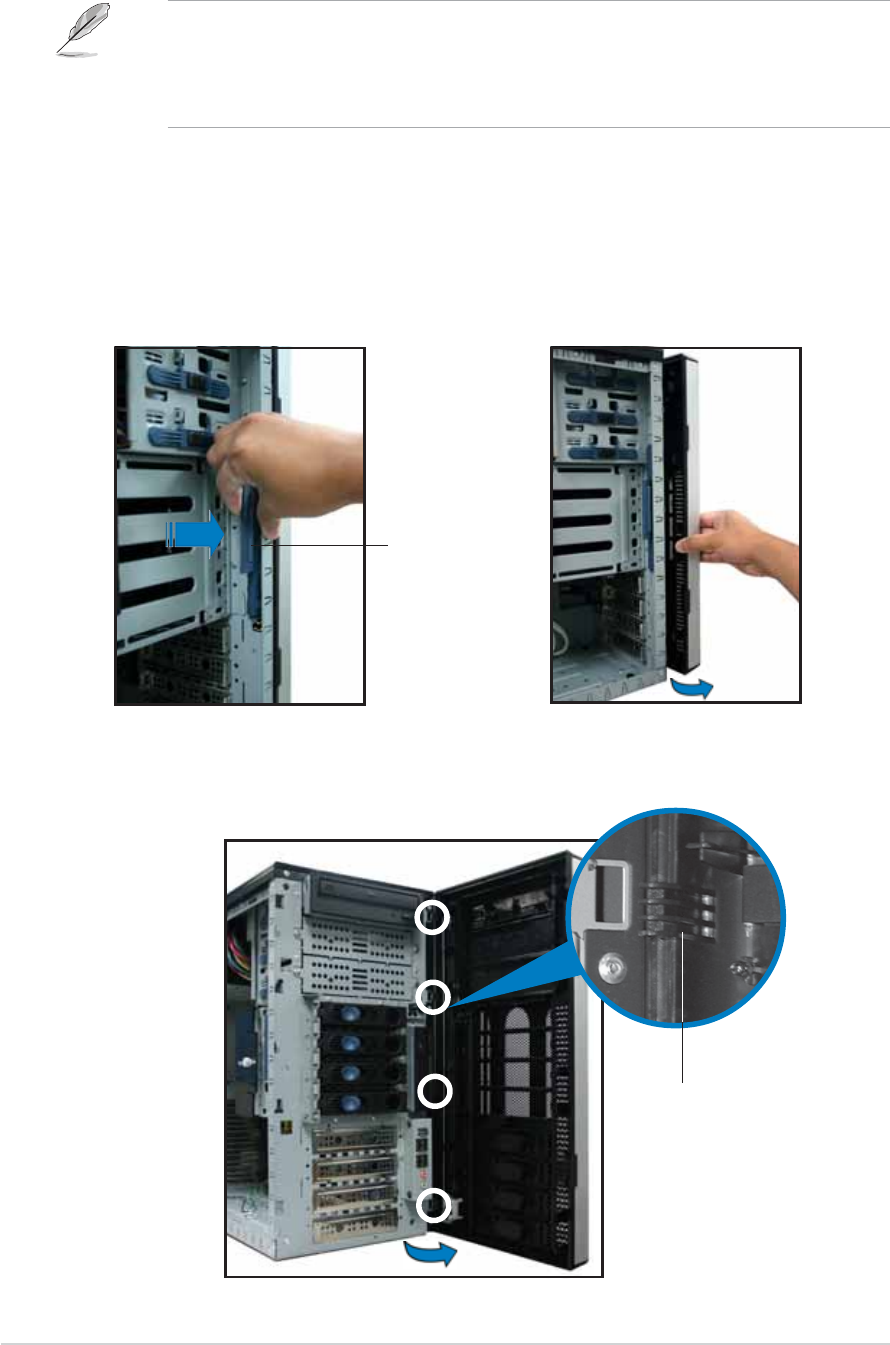
3. Unhook the hinge-like tabs from the holes on the right side of the
front panel to completely detach the front panel assembly from the
chassis.
Hinge-like tabHinge-like tab
Hinge-like tabHinge-like tab
Hinge-like tab
Before you can install a 5.25-inch drive, you should first remove the
front panel assembly (front bezel and front panel cover). The front panel
assembly is attached to the chassis through four
hooked tabshooked tabs
hooked tabshooked tabs
hooked tabs on the
left side and four
hinge-like tabshinge-like tabs
hinge-like tabshinge-like tabs
hinge-like tabs on the right side.
To remove the front panel assembly:
2.5 Front panel assembly
2.5.12.5.1
2.5.12.5.1
2.5.1
Removing the front panel assemblyRemoving the front panel assembly
Removing the front panel assemblyRemoving the front panel assembly
Removing the front panel assembly
2. Pull and swing the left edge of
the front panel outward.
Lock leverLock lever
Lock leverLock lever
Lock lever
1. Pull the lock lever (blue bar) on
the front edge of the chassis
outward to release the front
panel assembly.


