2-72-7
2-72-7
2-7
ASUS TW510-E2ASUS TW510-E2
ASUS TW510-E2ASUS TW510-E2
ASUS TW510-E2
2.3.32.3.3
2.3.32.3.3
2.3.3
Installing the heatsink and fanInstalling the heatsink and fan
Installing the heatsink and fanInstalling the heatsink and fan
Installing the heatsink and fan
The AMD Opteron™ 64 processors require a specially designed heatsink and
fan assembly to ensure optimum thermal condition and performance. Your
system comes with two proprietary CPU fan and heatsink assemblies.
Do not Do not
Do not Do not
D o n o t replace these CPU fans with other models.
Follow these steps to install the CPU heatsink and fan.
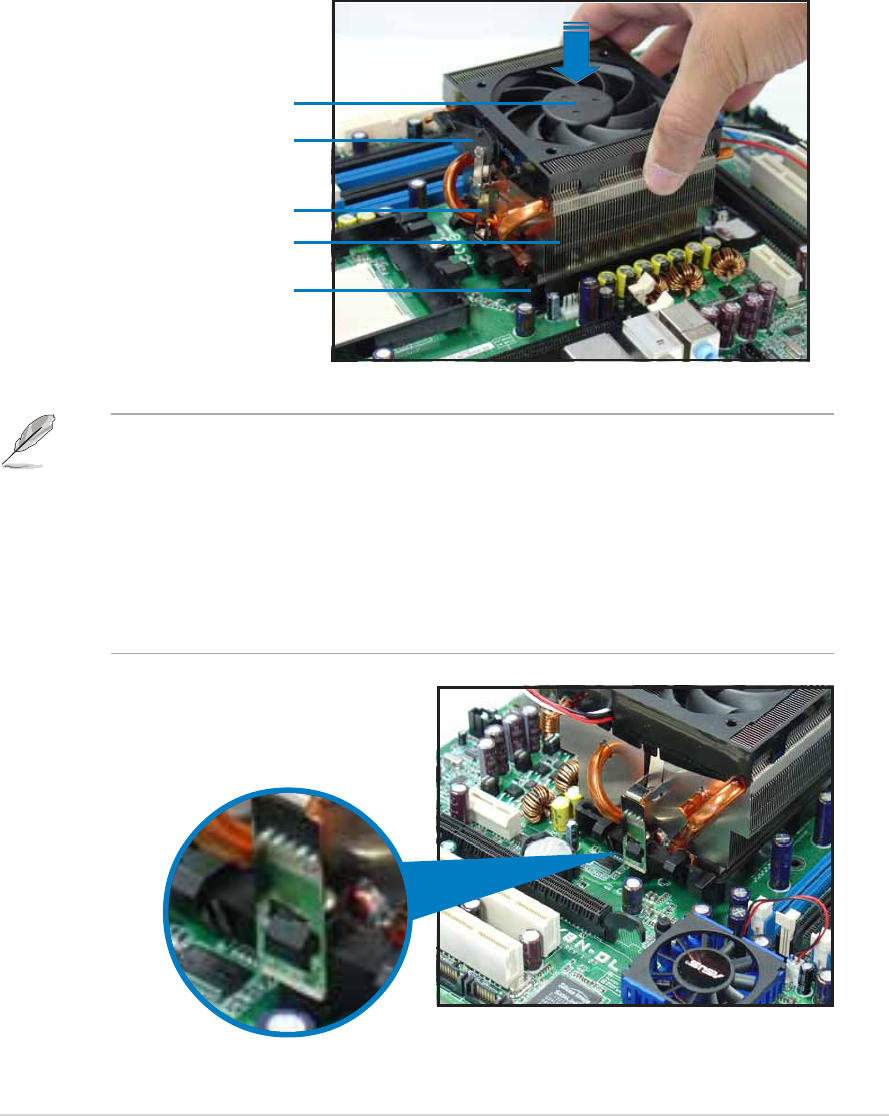
1. Place the heatsink on top of the installed CPU, making sure that the
heatsink fits properly on the retention module base.
Retention Module BaseRetention Module Base
Retention Module BaseRetention Module Base
Retention Module Base
CPU HeatsinkCPU Heatsink
CPU HeatsinkCPU Heatsink
CPU Heatsink
CPU FanCPU Fan
CPU FanCPU Fan
CPU Fan
Retention bracket lockRetention bracket lock
Retention bracket lockRetention bracket lock
Retention bracket lock
Retention bracketRetention bracket
Retention bracketRetention bracket
Retention bracket
• The retention module base is already installed on the motherboard
upon purchase.
• You do not have to remove the retention module base when
installing the CPU or installing other motherboard components.
• Make sure that a Thermal Interface Material is properly applied to the
CPU heatsink or CPU before you install the heatsink and fan
assembly.
2. Attach one end of the retention
bracket to the retention module
base.


