


16. Servicing
CAUTION: Ensure that an unused slot is always covered with a dummy front plate. Immediately install after
removing an input module a new input module or a dummy front cover.
16.8 Inserting an input module
Necessary tools
Phillips screw driver PH1
How to insert an input module
1. Ensure the projector is switched off and the power cord at the projector side is unplugged.
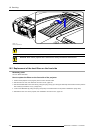
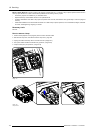
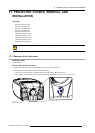
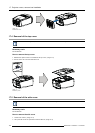
2. Slide the input module into the guides of the input slot. (image 16-12)
3. Push the input module forward until you feel that the connector of the input module fit in the socket of the input slot. The back of
the front plate of the module must touch the front plate of the input unit.
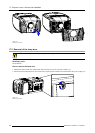
4. Secure the input module by fastening both captive screws in the top corners of the module.
Image 16-12
Insert module
16.9 Top-up the reservoir with cooling liquid
Access to the reservoir
1. Switch off the projector and pull out the power cord from the power outlet.
Remove :
- lamp door, see "Removal of the lamp door", page 182.
- front cover, see "Removal of the front cover", page 181.
- back cover, see "Removal of the back cover", page 183.
- top cover, see "Removal of the top cover", page 184.
- side cover, see "Removal of the side cover", page 184.
The reservoir is mounted half a way of the side of the projector.
Top-up procedure
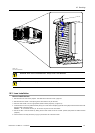
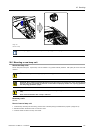
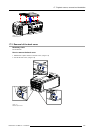
1. Turn the bolt to release the pressure (1) . Turn until the white indication line is in the Open area (membrane is at the bottom of
the reservoir) or until you feel to much resistance.
2. If you feel to much resistance, turn off the mai
n lid on top of the reservoir (A). (image 16-13)
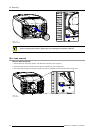
3. Loosen the bleed lid a little so that air can enter and close the bleed lid again.
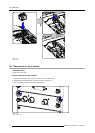
4. Turn on the bolt so that the white indication line is in the Open area (membrane is at the bottom of the reservoir).
5. Turn the bleed lid a little and take it out (B)
R59770021 CLM R10+ 11/10/2010
177