


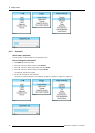
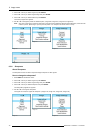
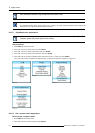
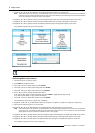

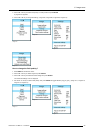

9. Image menu
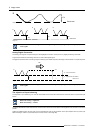
9. Toggle with ▲ or ▼ key to Black balance blue and adjust the blue black level on a minimal value.
Note: Thisminimal value isnot necessary ,provided that the2 othercolors are not influencing too much thecolor to be adjusted,
in fact the aim is to minimize the effect of the two other colors since there is a risk of reaching too soon the 50% transition
due to the contribution of these two other colors signals.
10.Toggle with ▲ or ▼ key to Black balance green and adjust the Green black level until bright spots appear on the screen.
11.Toggle with ▲ or ▼ key to Black balance blue adjust the Blue black level until bright spots appear on the screen.
12.Toggle with ▲ or ▼ key to Black balance red adjust the Red black level until bright spots appear on the screen.
The projected image should now be noisy full black
Image 9-46
Image 9-47
Image 9-48
Image 9-49
Image 9-50
If one uses a gray scale pattern, the bright spots should appear in the black bar.
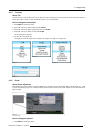
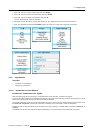
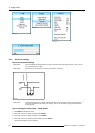
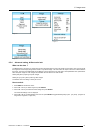
Performing White input balance
1. Connect the source you want to project.
2. Press MENU to activate the menus.
3. Use the ▲ or ▼ key to select Image and press ENTER.
4. Use the ▲ or ▼ key to select Image settings and press ENTER.
5. Use the ▲ or ▼ key to select Input balance and press ENTER.
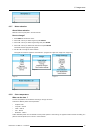
6. Do you want to use an internally generated test pattern?
If yes, Use the ▲ or ▼ key to select Test pattern and press ENTER to toggle between [on] and [off]
If no, select a white pattern (or gray scale as alternative).
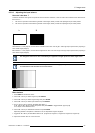
7. Use the ▲ or ▼ key to select White balance and press ENTER.
The white balance bar scale for a typical color is dis
played.
8. Toggle with the ▲ or ▼ key to select White balance red. (image 9-51, image 9-52, image 9-53, image 9-54, image 9-55)
9. Adjust the red white level (gain) on a minimal value
10.Toggle with ▲ or ▼ key to Whitebalanceblueand adjust the blue white level (gain) on a minimal value.
Note: Thisminimal value isnot necessary ,provided that the2 othercolors are not influencing too much thecolor to be adjusted,
in fact the aim is to minimize the effect of the two other colors since there is a risk of reaching too soon the transition
(bright spots) due to the contribution of these two other colors signals.
11.Toggle with ▲ or ▼ key to White balance green and adjust the Green white level (gain) until bright spots appear on the screen.
12.Toggle with ▲ or ▼ key to White balance blue adjust the Blue white level (gain) until bright spots appear on the screen.
13.Toggle with ▲ or ▼ key to White balance red adjust the Red white level (gain) until bright spots appear on the screen.
The projected image should now be noisy neutral gray.
84 R59770021 CLM R10+ 11/10/2010