


5. Connections
5. CONNECTIONS
About this chapter
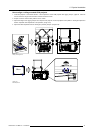
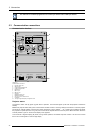
This chapter describes more in detail the power (P), the input source (S) and the communication (C) connections of the CLM R10+.
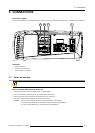
C S PC
Image 5-1
Overview
• Power connection
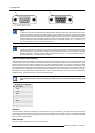
• Input source connections
• Communication connections
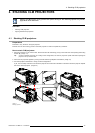
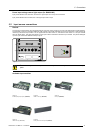
5.1 Power connection
CAUTION: Use only the power cord provided with the projector.
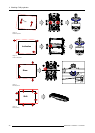
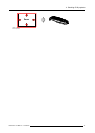
How to connect with the local power net
1. Ensure that the power switch (S) stands in the “0” (OFF) position.
2. Connect the power cord with the power input socket of the projector (P).
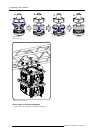
3. Secure the power plug by locking the plug holder clamp (H). (image 5-2)
4. Connect the male side of the power cord to the local power net.
Caution: Ensure that the power net meets the power requirements of the projector.
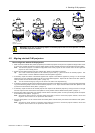
For order number R9050100 and R90501001 100-120/200-240V 12/8A 50/60Hz
For order number R90501005 : 100-120/200-240V 16/8A 50/60Hz
R59770021 CLM R10+ 11/10/2010 39