


3. Physical installation
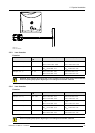
A
A
B
C
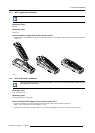
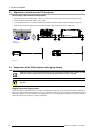
Image 3-19
Riggingslotsandclamps
Necessary tools
Open end spanner 17 mm
Necessary parts
• Four rigging clamps (R855943)
• Safety cable (B361213)
• Two snap hook locks (B361212)
Mounting the rigging points into the handle
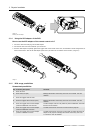
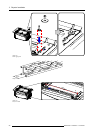
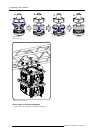
1. Push the cup square neck bolt through the slot input and slide the bolt into the slot. (image 3-20)
Note: Take the bolt by its thread so that it does not fall inside the carry handle.
The cover plate will move down while pushing with the head but comes back to its position once the bolt is in the slot.
2. Slide a washer on the bolt and turn on a nut.
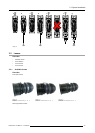
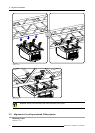
3. Measure the distance, center tube as reference, between the two used support bars of the truss. (image 3-21)
4. Slide the rigging points on there place in the slots, according the measured distance and secure this position by fastening the
nut completely. Ensure that the rigging points are symmetrically lined up, so that the projector will hang in balance. If necessary
move point B from a transversal position to a longitudinal position. (image 3-22)
Warning: Always secure the rigging points after adjustment.
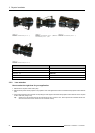
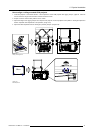
5. Turn the rigging clamps on the bolts. (image 3-23)
6. Place all four rigging clamps in open position as illustrated. (image 3-24)
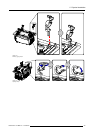
7. Place the projector (upside down) under the truss installation and lower the truss until the support bars of the truss are nearby
the rigging clamps on the projector. (image 3-25)
8. Lift up the projector and hook the four rigging clamps over the support bars of the truss.
9. Lock all four rigging clamps.
10.Install the safety cable. Hook one end into a provided hole. Route the cable around the truss and hook the other end into a
second hole in the carry handle. (image 3-26)
R59770021 CLM R10+ 11/10/2010
27