6-14
Using the Fax Functions
Forwarding Fax Documents
There are two forwarding methods: registering a forwarding
destination beforehand (automatic forwarding) and selecting a
fax document received in the memory (manual forwarding).
"
Registering Forwarding Destinations (Automatic
Forwarding)
" (
→
P.6-14
)
"
Forwarding Received Fax Documents in Memory to Other
Destinations (Manual Forwarding)
" (
→
P.6-14
)
Also, if a forwarding error occurs, see the following section.
"
Re-forwarding/Printing/Deleting the Documents in which a
Forwarding Error Occurs
" (
→
P.6-15
)
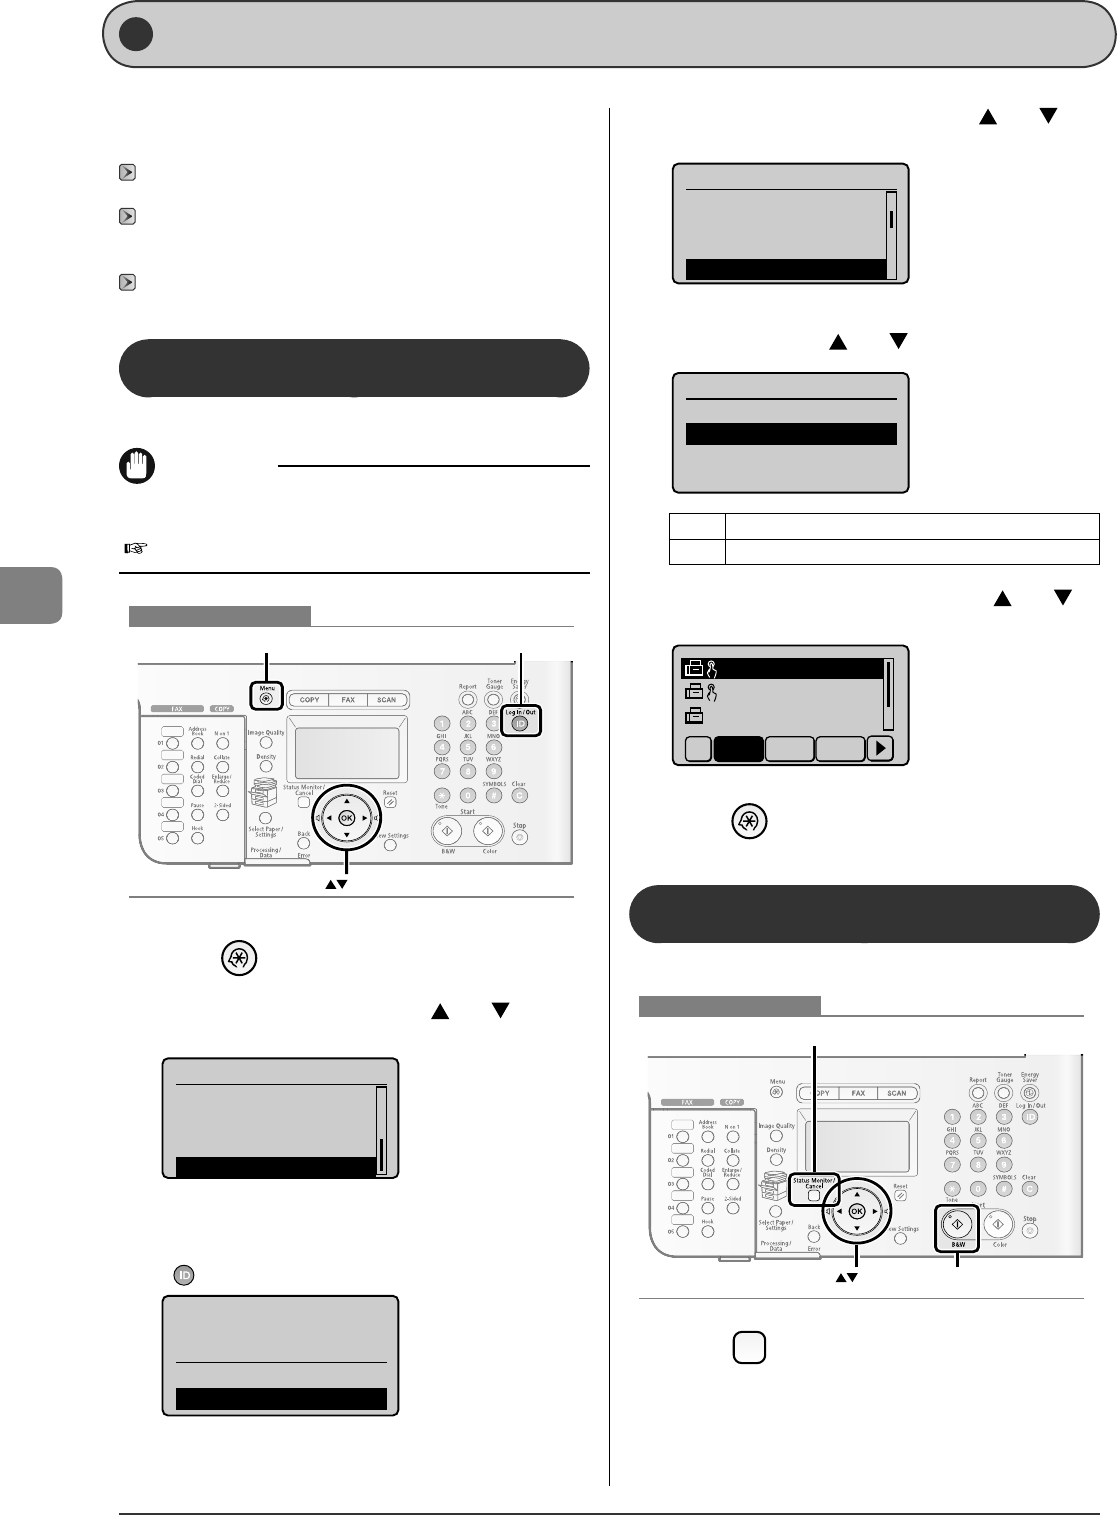
Registering Forwarding Destinations
(Automatic Forwarding)
You can forward received documents to a speci ed destination.
IMPORTANT
Setting for <Forwarding Settings>
You can specify also from the Remote UI.
e-Manual
→
Setting and Managing from Computer
→
Setting Transfer
OK
Menu Log In/Ou
t
Keys to be used for this operation
1
Press [ ] (Menu).
2
Select <System Settings> with [ ] or [ ], and
then press [OK].
Menu
Printer Settings
Timer Settings
Adjustment/Cleaning
System Settings
When the system manager ID and system manager PIN are
speci ed
Use the numeric keys to enter the ID and number, and then press
[
] (ID).
Sys. Manager ID/PIN
Login: Press ID
Logout: Press ID
Manager ID: 0123456
PIN: *******
3
Select <Forwarding Settings> with [ ] or [ ],
and then press [OK].
System Settings
Dept. ID Management
Network Settings
Communications Sett...
Forwarding Settings
4
Select <On> with [ ] or [ ], and then press [OK].
Forwarding Settings
Off
On
<O > Does not specify the forwarding setting.
<On> Enables the forwarding setting.
5
Select a forwarding destination with [ ] or [ ],
and then press [OK].
CAON01 01234567
CAON02 9876543...
CAON03 0011223...
All A-Z 0-9
6
Press [ ] (Menu) to close the menu screen.
For warding Received Fax Documents in Memory
to Other Destinations (Manual Forwarding)
You can specify destinations and send a document in memory.
OK
Status Monitor/Cancel
Start
Keys to be used for this operation
1
Press [ ] (Status Monitor/Cancel).


