


88 Troubleshooting
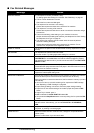
Colors Are Uneven or Streaked
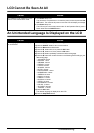
The Print Result Not Satisfactory When Copying
If these do not resolve the problem, also see “Print Results Not Satisfactory” on page 84.
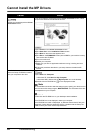
Printing Does Not Start
Cause Action
Print Head nozzles are clogged. See “When Printing Becomes Faint or Colors Are Incorrect” on page 59 and
perform any necessary maintenance operations.
Print Head is misaligned. See “Aligning the Print Head” on page 64 to perform Print Head Alignment using
the Operation Panel.
Cause Action
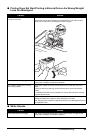
The original document is not loaded
correctly.
Check that the original is loaded correctly on the Platen Glass or the ADF.
See “Loading Original Documents” on page 8.
The original document is loaded with
the wrong side facing upwards.
When loading the original on the Platen Glass, the side to be copied should be
face down.
When loading in the ADF, the side to be copied should be face up.
The original document is a printout
from this machine.
Print quality may be reduced if you copy a printout.
Instead of copying a printout, print the original directly either from the digital
camera or your computer.
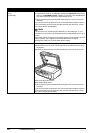
The Platen Glass, the inner side of the
Document Cover, or the ADF is dirty.
Clean the Platen Glass, the inner side of the Document Cover, or the ADF.
See “Cleaning Your Machine” on page 73.
Cause Action
Unnecessary print jobs are left in
queue. / Computer problems.
Restarting your computer may solve the problem.
If there are any unnecessary print jobs, follow the procedure below to delete
them.
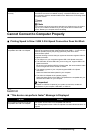
(1)Open the printer properties dialog box.
Refer to “Opening the Printer Properties Dialog Box Directly from Control
Panel” in “Opening the Printer Properties Dialog Box (Windows)” of the
User’s Guide on-screen manual.
(2)Click the Maintenance tab and then View Printer Status.
The printer status monitor is displayed.
(3)Click Display Print Queue.
(4)Select Cancel All Documents on the Printer menu.
You may not be able to select this depending on the privileges of the
account.
(5)When the confirmation message is displayed, click Yes.
The print jobs are deleted.
(1)Click the printer icon in the Dock to display the list of print jobs in progress.
In Mac OS X v.10.2.8, click the printer icon in the Dock to start up the Print
Center and double-click the name of your machine in the Printer List.
(2)Select the print job to delete and click .
The print jobs are deleted.