RAID Array 3000 Controller Shelf
3–8 EK–SMCPQ–UG. C01
2.
Determine the mounting location in your cabinet.
3.
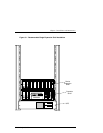
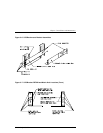
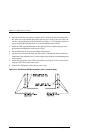
Install the left shelf support by aligning the bracket and cabinet rail holes
and then securing the support to the cabinet using two screws (item 7, Figure
3–5). Do not tighten screws.
4.
Install the nut plate (item 5, Figure 3–5) behind the left rail and secure with
three screws. Tighten all five screws.
5.
Repeat steps 2, 3, and 4 to install the right shelf support in the cabinet.
6.
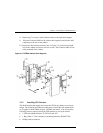
Install the support bracket (item 6, Figure 3–5) by securing the bracket studs
with two plate nuts (item 8, Figure 3–5).
7.
Install a shelf retainer bracket (item 1, Figure 3–5) in the rear slot of the left
shelf support and secure with two screws.
8.
Repeat step 7 to secure a shelf retainer bracket to the right shelf support.
9.
Place the Controller Shelf on the cabinet shelf supports and slide the shelf
completely to the rear of the cabinet.
10.
Install two shelf retainer brackets (item 1, Figure 3–5) to the left and right
rails of the cabinet and secure with two screws. The Controller Shelf is now
safely mounted in the cabinet.
3.2.1.2 Installing Shelf Supports in a RETMA Cabinet (Square Hole)
Use the following procedure to install the shelf supports into a RETMA cabinet
with square holes in the mounting rails (see Figure 3–5).
1.
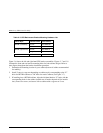
Open the kit and ensure it contains the items listed in Table 3–2.
2.
Retrieve six washers (part no.: 90-06664-00) from general packaging.
3.
Determine the position of the shelf supports in the cabinet.
4.
Install the left shelf support by aligning the support and cabinet rail holes
and then securing the support to the cabinet using three screws (item 7, Fig-
ure
3–5) and washers. Tighten the screws.
5.
Repeat steps 3, and 4 to install the right shelf support in the cabinet. Align
the support with the left unit and tighten the screws.
6.
Install the support bracket (item 6, Figure 3–5) by securing the bracket studs
with two plate nuts (item 8, Figure 3–5).
7.
Install a shelf retainer bracket (item 1, Figure 3–5) in the rear slot of the left
shelf support and secure with two screws.


