


RAID Array 3000 Controller Shelf
3–10 EK–SMCPQ–UG. C01
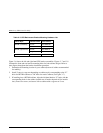
Table 3–3 UPS Rack-mount Bracket Mounting Hardware List
Cabinet Style Hardware Item Part Number
RETMA (round hole) Screw 90-00063-39
U-Nut 90-07786-00
RETMA (square hole) Screw 90-40331-01
Cage Nut 90-11476-01
Washer 90-0664-00
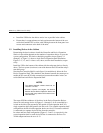
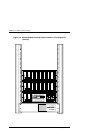
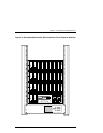
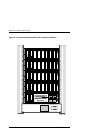
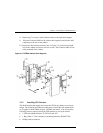
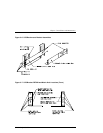
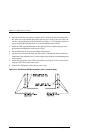
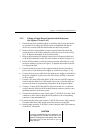
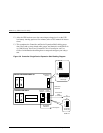
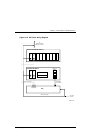
Figure 3–6 shows the left and right-hand UPS bracket assemblies. Figures 3–7 and 3–8
illustrate the front and rear bracket mounting holes for both cabinet designs. Refer to
these figures throughout the bracket installation procedure.
1.
Determine the mounting location in your cabinet (bottom of cabinet recommended
for stability).
2.
Install U-nuts (or cage nuts depending on cabinet style) corresponding to the “E”
holes for RETMA cabinets or “M” holes for metric cabinets (see Figure 3–7).
3.
If installing into a RETMA cabinet, align the left-hand bracket “E” holes with the
corresponding holes in the cabinet (extend rear of bracket beyond rail for installa-
tion), insert two screws, and secure with to cabinet with a cage nut or U-nut.