


Removing and Replacing Parts 4-7
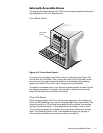
([WHUQDOO\$FFHVVLEOH'ULYHV
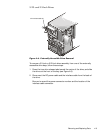
The chassis provides three bays for 5.25-inch externally accessible drives and a
bay dedicated to a 3.5-inch diskette drive.
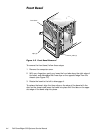
) U RQW3DQHO,QVHUWV
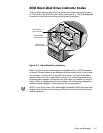
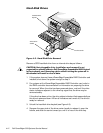
)LJXUH)URQW 3DQ HO,QVH UWV
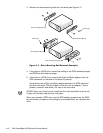
To remove the front-panel insert that covers an unused bay (see Figure 4-5),
first remove the front bezel. Then, facing the inside of the front bezel, press
one of the securing tabs (located at each end of the bezel) while pressing
against the center of the insert until it springs free from the bezel.
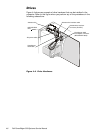
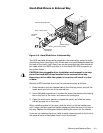
To replace a front-panel insert, from inside the chassis place the insert into the
bay opening and press it into place until the tabs on each end of the insert
snap into the latches on the inside of the bezel.
&ORVH2XW3DQHOV
Metal close-out panels that fit into the drive-bay openings in the chassis pro-
vide extra EMI shielding if you are not using the plastic front-panel inserts. The
close-out panel for a 1.6-inch bay has a raised lip at the bottom that overlaps
the top of a panel beneath it, if any. Because of the overlap, if two or more
1.6-inch close-out panels are installed, you must remove them from the top
down. The close-out panel for the 1-inch diskette-drive bay (the top bay in
either chassis orientation) is narrower and has no overlap lip.
front-panel
inserts