


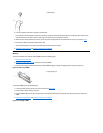


Expansion-Card Removal
To remove an expansion card, perform the following steps:
1. Remove the computer cover.
2. If necessary, disconnect any cables connected to the card.
3. Remove the screw on the mounting bracket of the card you want to remove.
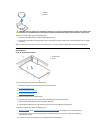
4. Grasp the card by its outside corners, and ease it out of its connector.
5. If you are removing the card permanently, install a metal filler bracket over the empty card-slot opening.
6. Replace the computer cover and reset the chassis intrusion detector.
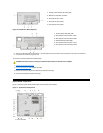
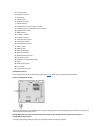
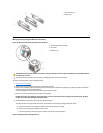
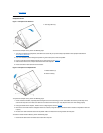
Expansion-Card Installation
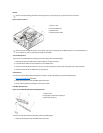
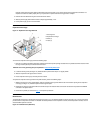
Figure 20. Expansion-Card Installation
To install an expansion card, perform the following steps:
1. Prepare the expansion card for installation, and remove the computer cover.
See the documentation that came with the expansion card for information on configuring the card, making internal connections, or otherwise
customizing it for your system.
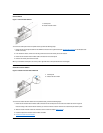
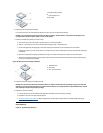
2. Remove the screw and remove the metal filler bracket that covers the card-slot opening for the expansion-card slot you intend to use (see
Figure 21).
Save the screw to use when installing the expansion card later in this procedure.
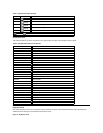
Figure 21. Filler Bracket Removal
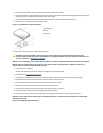
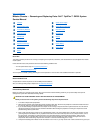
1
8-bit ISA expansion card
2
16-bit ISA expansion card
3
32-bit PCI expansion card
NOTE: Installing filler brackets over empty card-slot openings is necessary to maintain Federal Communications Commission (FCC)
certification of the system. The brackets also keep dust and dirt out of your computer.
1
Expansion card
2
Card-edge connector
3
Riser board
4
Expansion-card connector
5
Expansion-card cage
CAUTION: Some network cards automatically start the system when they are connected. To guard
against electric shock, be sure to unplug your computer from its electrical outlet before installing any
expansion cards.