


NOTICE: Do not reuse the old heat sink assembly when you replace the microprocessor package. Using the old heat sink
assembly can cause the microprocessor to overheat because there is not enough thermal compound between the old heat
sink assembly and the microprocessor package.
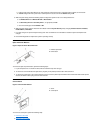
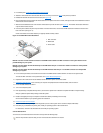
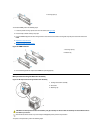
9. Replace the heat sink assembly.
a. Peel the release liner from the adhesive tape attached to the bottom of the new heat sink assembly.
b. Place the heat sink assembly on top of the microprocessor package.
c. Orient the metal retaining clip and hook the unhinged end of the clip over the tab on the top edge of the ZIF socket.
d. Press down on the hinged end of the clip to snap the clip over the tab on the bottom edge of the ZIF socket.
10. Reconnect the cooling fan power cable to its system board connector.
11. Replace the computer cover and restart the system.
12. Enter System Setup and confirm that the system data area correctly identifies the type of microprocessor installed.
13. Reset the chassis intrusion detector. While in System Setup, confirm that the system data area correctly identifies the type of microprocessor
installed.
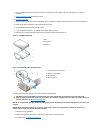
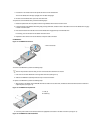
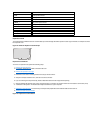
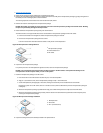
System Battery
Figure 30. System Battery Removal
To remove the system battery, perform the following steps:
1. If possible, enter System Setup and print the System Setup screens.
2. Remove the system battery by carefully prying it out of its socket with your fingers or with a blunt, nonconducting object such as a plastic
screwdriver.
When you replace the system battery, orient the new battery with the "+" facing up. Insert the battery into its socket and snap it into place.
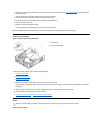
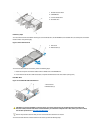
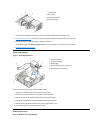
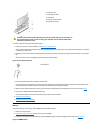
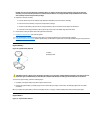
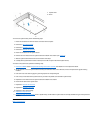
System Board
Figure 31. System Board Removal
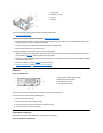
1
Battery
2
Battery socket
CAUTION: There is a danger of the new battery exploding if it is incorrectly installed. Replace the battery only with the same or
equivalent type recommended by the manufacturer. Discard used batteries according to the manufacturer’s instructions.