


2. Disconnect the DC power and data cables from the back of the drive.
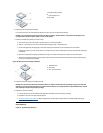
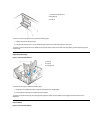
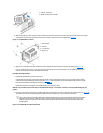
3. Squeeze the retaining tabs that extend from each side of the drive bracket and slide the bracket out of the bay (see Figure 8).
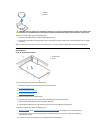
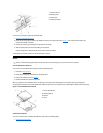
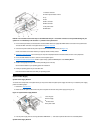
4. Turn the drive assembly upside down and unscrew the four screws that secure the drive to the bracket (see Figure 9).
To install a 5.25-inch drive, perform the 5.25-inch drive removal procedure in reverse and reset the chassis intrusion detector.
Figure 8. 5.25-Inch Drive Removal
Figure 9. Drive Bracket
Hard-Disk Drive Removal
1. Remove the computer cover.
2. Remove the drive bracket from the chassis.
If a hard-disk drive is already installed on the drive bracket, disconnect the DC power cable and EIDE cable from the drive.
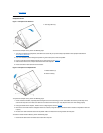
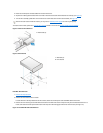
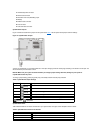
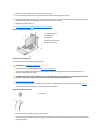
3. Remove the screw securing the hard-disk drive bracket to the front wall of the chassis. Grasp the front part of the bracket that serves as a
handle, and rotate the bracket up toward the back of the computer until it disengages from the floor of the chassis (see Figure 10).
Figure 10. Hard-Disk Drive Bracket Removal
NOTE: For easier access inside the chassis, you may want to rotate the power supply out of the way temporarily.
1
Bracket tabs (2)
1
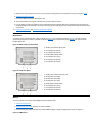
Metal tabs (2)
2
Drive bracket