


1. If you are replacing a hard-disk drive that contains data you want to keep, make a backup copy of your files before you continue this
procedure.
2. Remove the computer cover if not already removed.
3. Remove the drive shelf.
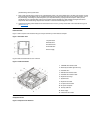
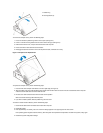
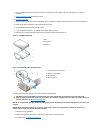
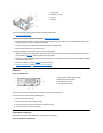
4. Squeeze the tabs on each side of the hard-disk drive/bracket, and pull the hard-disk drive/bracket forward about one inch (see Figure 10).
5. Disconnect the power and interface cables from the back of the drive.
6. Lift the hard-disk drive/bracket away from the chassis.
7. Lay the hard-disk drive/bracket on an antistatic surface with its bracket facing up.
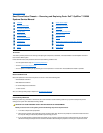
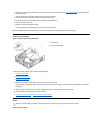
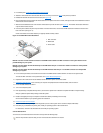
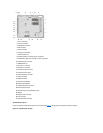
8. Remove the four screws securing the hard-diskdrivetothebottomofthebracket(seeFigure11).
Figure 11. Drive Bracket Removal
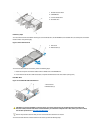
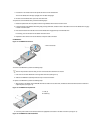
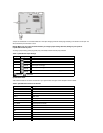
Figure 12. Hard-Disk Drive/Bracket Replacement
To install a replacement hard-disk drive in the chassis, perform the following steps.
NOTICE: To avoid possibly damaging the drive by ESD, ground yourself by touching an unpainted metal surface on the back of the
computer.
NOTICE: When you unpack the drive, do not set it on a hard surface, which may damage the drive. Instead, set the drive on a
surface, such as a foam pad, that will sufficiently cushion it.
1. Prepare the drive for installation.
Check the documentation for the drive to verify that it is configured for your computer system.
2. If not already done, remove the computer cover.
1
Drive
2
Drive bracket
3
Screws (4)
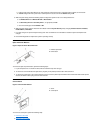
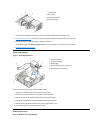
1
Tabs on bottom of drive bracket
2
Hooks on chassis floor
3
Drive bracket
4
Release tabs (2)
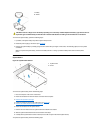
CAUTION: To avoid the possibility of electric shock, turn off the computer and any peripherals, disconnect them from
electrical outlets, and then wait at least 5 seconds before you remove the computer cover. Also, before you install a drive, see
the other precautions in "Precautionary Measures."